Zannu
Members
-
Joined
-
Last visited
-
Since my last post I have got what I believe to be the correct inner CV boots. I believe the lack of grease was caused by the boots being wrong, and so it all leaked out. I packed lots of grease into the joints, and re-assembled with the right boots and clips. So far everything seems to be good, no vibrations on the limited test drive I have been able to go on. Once lockdown is over I will be able to give it a proper test with some longer journeys just to check everything really is sorted once and for all. Ah yes, I worked on Classic cars for a few summers not long ago and they were all very old style, with 2 opposed roller taper bearings to hold the hubs on, easy to re-grease or change when we had to. But these were on race cars so didn't have quite the life a road car would. Ashame that a lot of cars don't have easy to service components, we live in a replace age, rather than repair. And interesting, I believe on steam engines they have an autolube system too, that keeps everything important coated with enough oil to ensure parts never wear out. A good idea on industrial vehicles that get a lot more miles piled onto them than a normal car.
-
@Judd Thank you for the advice. This evening I have pumped lots of Morris Lubricants K48 Moly grease into my subaru's front CV joints. The vibration has gone, just as you said it might. I wasn't sure this was going to be my only issue, I was worried I had worn the joints to the point grease wouldn't do anything. Having been on a test drive it is so much better. I put some re-usable clips on the small end of the boot, that I don't like, but are easy to undo too. Maybe this weekend I will undo them and pump more grease in. It is odd just pumping away, there is no way to tell if grease is actually coming out apart from the resistance in the lever, and so I wasn't sure how much to do. Having been on a test I am sure it is the solution, so can go crazier. Seems like they were really pretty empty. I think the boot doesn't fit perfectly on the larger side of the boot as the outdrive is not circular and the boot is, so grease was escaping. Now I know this is the problem I have an idea to stop it leaking ever again. Once again this forum saves me from lots of unnecessary wasted spending. Thank you
-
Why, does she not like using it? I have mine adjusted to a point I am very happy with and do find it handy. But I get that it wouldn't be for everyone, and slightly odd to start using, until you trust it to actually hold you still. And yeah, certainly a funny name for it 😂
-
Apologies on the massive delay, but I did say I would add photos, and here they are. The hill hold unit on my SG5 Forester is located on the right of the engine bay, quite hidden unless you know where to look. I have circled it here to make it easier to spot. This is a closer look at the unit. In the red circle is the spring which for me had sheared. I bought a second hand unit for about £20 just for the spring, maybe not my most sensible decision but I did find I use the hill hold quite a lot and was worth doing it properly for me. In black there are the adjuster nuts that set the clutch point when the brakes release. I took these off when the spring had failed, and moved the cable so it was no longer through the actuator arm, I left the cable sit where the blue line is. This meant that the hill hold would stay off and I could drive until I got the replacement spring. I did find a different spring that wouldn't allow operation of the unit, but that would ensure the hill hold didn't vibrate or move on. I hope this might help someone, if they get stuck.
-
I have found a sealey one that looks like the type you are talking about, and bought a separate grease gun to use with CV grease. I have several already but they are being used for other greases. I think it will be worth having a dedicated one even if it isn't used that often (hopefully). From what I can see/found online I think mine just have the sprung circlip, but if I can just re-grease that would be even better. I will check later but pretty certain I have some spare of the smaller diameter clips from when I changed the boots a while ago. The roll pin design sounds super. Much easier than it leaking oil everywhere! I know on VW's and maybe more, they have a flange at the inner, so it just bolts together. Again, makes it easy to replace the joint.
-
Hi Judd, Thank you for the reply. I have not tried re-packing the joints, and didn't know about the laser tool for a grease gun. I thought that as mine was making noise it would probably be bad enough I would just need to replace it, plus I have driven on it for a while whilst it has been making the noise, but I shall try greasing them up. I have also renewed the inner and outer boots on my forester, so I have had those circlips off before, and the joint taken off. I just wasn't sure how to get the gearbox side of the joint out. I shall have a look when I am next under my car. I shall get all the items I need for greasing and have a go hopefully at the weekend. Thanks for the helpful comments and advice, I shall let everyone know how I get on and if re-greasing fixes my issue.
-
Hi all Been enjoying my forester but recently noticed a vibration. It only happens when accelerating (first noticed on hard acceleration) and from about 40mph. From what I have read here and on other forums, this is likely to be the front inner CV joints. Over the Christmas break I did a tyre rotation, partly to check there wasn't anything with the wheels that could be causing the vibration and partly because I try to every once in a while. Whilst the wheels were off I tried moving the drive shafts, and the front left had 1mm or so play up, down, left and right at the gearbox end, so I believe this is my problem. I will replace both front joints whilst doing it. I already changed all the CV boots not too long ago, so thinking either I did something wrong then that has led to the damage, or just 147K driveshafts are worn out, but I know what I am doing to be able to swap the parts myself. So my question to you all - What is the best way to replace the front inner CV joints? I read somewhere, think it was this forum, that all the knock off shafts are not worth having, better to replace just the joint. I am happy to do this, and probably the cheaper option. So what brand is best for the inner joints? Should I be changing the whole shaft seeing as I am there? (I want to keep the car for at least a few more years so worth doing it properly) When I pull the gearbox side of the joint out the box will gearbox oil pour out and so I need to have replacement fluid ready? Can I tell if I have 21 spline or 25 spline gearbox outdrives without pulling them out? Any other advice from people who have done this job would be greatly appreciated. Many thanks everyone, Matthew
-
Had an interesting problem earlier this week and thought I would share this for anyone who encounters the same issue. Having parked on our drive (on a slope) I left my Forester (2003) and when I came back to it in a few days time to use I got in and tried to drive off. All the brakes were locked on solid. Couldn't get it to move at all. It felt like the hill hold was on permenantly which was weird. Turns out I was right. So after some investigation we found where the hill hold adjustment was. Decided it couldn't be much else. I had fitted new front brakes a few weeks prior, but driven to Lands End and back since, so covered over 400 miles on the new brakes and not had any issues with my car having been left for a week at times without driving. Also it was all the brakes so not something like the handbrake sticking on. Looking at the hill hold lever/valve it was immediatley obvious what was wrong. Whilst parking the hill hold had activated and at some point in the last section of my journey the return spring had corroded enough that is sheared. So there was only half the spring attached. This meant when parking and the hill hold activated, the valve was never returned and it stayed locked on, so my feeling like the hill hold was on turned out to be right! My temporary solution was to note where the adjuster was and unscrew it. This means I could take out the rod that actuates the valve. Now the rod for the actuator sits beside the arm. This means I no longer have hill hold, but also my brakes are not permenantly locked on! I am going to get another spring very soon and can put the system back together as I do enjoy the convenience of the hill hold sometimes. Just thought this might help someone who is panicing as they get to their car and find the brakes are all locked on! Certainly stressed me a little but fortunatley it was just to go to a welding store so not a time critical journey. I might try and get some pictures to add here when I put another spring back onto the system.
-
Thanks @Mr B I am trying to use decent branded parts as it should pay off in the long run. And found I can get them all fairly cheap from Buy Car Parts which is in Germany. Takes a week or 2 to arrive but I think worth it for the prices. They have a lot of cheap copies too so I just filter it so I can only see the few decent brands. Seems to have worked perfectly for the boots and brakes so far. Ok, I will have a look at castrol too. Still not too sure what I will go with and when, I just know it is one of the next upgrades on my list of things I want to do. Lol, the problem with getting money into the economy is I don't have that much at the moment! Waiting for a work placement year to start having finished my second year of University, so can't go out driving too much unfortunatley. Makes sense for caster adjustment. Didn't feel any different on the Impreza ones, but thought it best to stick with what it came with. Not sure how much it would actually adjust it by. And we did try threaded bars and sockets. Had some success doing that for the smaller ones but just didn't have the right size sockets. I will invest in a proper kit with a good selectrion of cups before doing any more. Thanks, I am having fun and still loving the car 👍
-
Got some more work done on my car. A few weeks ago I replaced all my front CV boots. I used SKF replacements and also bought Oetiker clips for the few that had a different style which I wasn't able to get as tight. I also had to buy the proper tool for these clips, but it was well worth it as it made it very easy to get the clips tight enough. Everything went fairly smoothly although the snap ring was a pain to get on and off for one side. Was able to just remove the lower ball joint and leave the drive shafts in the car. Had enough room to move things around. It was a good afternoons work, but was completed within this. Then for my birthday a few weeks ago I got some uprgaded brake discs and pads. I needed to replace these anyway, so went for some Brembo max discs with Brembo Xtra pads. Should be a nice little upgrade in brake performance. The change over went very well and I am now bedding them in nicely. Very happy with everything. Looking at a brake fluid change sometime soon as well, thinking Motul RBF600 but opinions as to the best for daily driving and some spirited country lane driving would be helpful. The back side of the old discs were really grooved, the front not as bad, but they did really need changing so glad I did it
-
I just used a manual wire brush with this, but it worked very well. Better than I thought but probably as there wasn't any corrosion and the mucky wasn't really caked on. And I think my photos are bigger than that. But I completley forgotten to add them so thanks for reminding me! Before and after cleaning up the rear mounts from the original steel arms Looking much better shiny, not sure how long it will last but was worth the effort The arms came out easily have only been changed recently. My dad helped as well, so in 30 mins we had both off This was interesting to see. So the alloy arms are compatible. But the rear bush housings are different. I used the impreza ones when originally fitting things to my car, which was not ideal. So hence putting on the original housings from the steel arms. You can see the different height which will adjust the angle the arm is at. I don't actually know if it makes any difference in terms of geometry, but imagine it will change the roll centre a bit or something like that? I will learn more about that in the 4th year of my uni course anyway so will know then! You can also see the stock Forester one has much thicker flanges where the bolts got through. Not sure if that is really needed but another interesting difference I think Poly bushes all fitted. Once the old bushes were out this was an easy process to grease things up and push them into place All sorted. Installation didn't take too long either, and they got torqued up with load on the front. This was the leaking cv boot. I will get on and fix that soon
-
Today I got the bushes swapped out for the poly bushes. Learnt a few things. The rear bushing mount that came with the alloy arms was actually not right for my car, but I had used it so put the arm at a slightly incorrect angle. This morning I sorted this by cleaning up the rear bushing mount from my original steel arms that came off the car. Amazing how quickly they cleaned up with a manual wire brush. So used them in re-assembly so everything fit a bit better. Otherwise it all went pretty well. As it was not long ago that I changed the arms they came off pretty quickly and easily. Getting the old bushes out was a pain, but once I found the right size sockets and applied some heat the front ones pressed out. And found that burning out and hacksawing the rear bushings was the best method for those. Got the polybushes in easily enough and put it all back together, torquing things up once the car was at ride height on the axle stands under the ball joints. I have a load of photos but currently my image hosting site of choice (post image) is down for maintainance so they will have to wait till tomorrow. Not done a test drive yet with the isolation we are in, but I will let everyone know what it feels like when I get the chance. Also found a cv boot has a small hole in it so slinging grease about a bit, so going to order some of them and probably change all the front CV boots. Cheap to do and I have the time at home for now so might as well change all of them at the front. Any that come off good will be kept as spares incase another punctures in the future.
-
Thanks. Progress will probably be slow as it is just when I can afford things or they need changing. And I don't want to mess with it too much yet, everything seems to be working well (done 140k miles) and I like the reliability I am getting. In the advanced technology department so not racing stuff, but should be a very cool year of work. It probably will get light off road use from time to time. Unlikely to be anything that serious, but keeping comfort and flex should help if I do. Just got to get them changed over now.
-
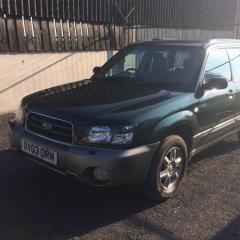
Hi All, Thought it was time I got a thread going for my car, for all the odd little jobs I do that don't warrant seperate posts. Just to generally document what I do as time goes on. So I bought my 2003 Forester in April last year. It is a 2.0 non turbo that cost me under £1500 to buy, and got an MOT just before I bought it. Had a few jobs to do since, and tinkering here and there. I should say I am a uni student studying Off Highway Automotive Engineering, and this is my first car! So not got the greatest budget at the moment, but I plan on looking after this car and hopefully it will last a while. I hope it will get a few nice parts through the next year as I will be on a placement year working at Prodrive!! Further in the future it may even end up with a different heart when funds allow. Work done so far: When bought to exhaust had already got a replaced back section to pass the MOT, but it didn;t take long for the cat section to cause problems. A lot of rust around a guard meant there were a lot of holes in the pipe. So whilst working at a classic car garage last summer (Wren Classics in Shaftesbury) I was able to buy a new cat section and install it one evening after work, using the 4 post lift. Before Then I had a look at the brakes at some point at Uni. Put some new front brake pads in, as well as doing an engine oil and filter change. Could probably do with some new discs in the not too distant future, but waiting till placement year when money should be more available, and probably go for some slightly upgraded road pads at the same time. The most recent fun, and the reason I found this forum was a failure of my lower control arms. Only one went badly enough I could hear it, but both were very dead when I actually looked at them closely. @Mr B was very helpful showing me some that would fit and so I now have second hand alloy Impreza arms in. Got new ball joints and drop links, but should probably have got new bushes as well. So after a little more research I have bought some strongflex polybushes which I plan to install on Monday, making the most of isolation. Only gone for the standard road replacement strength, not stiffer for now. This car is still my daily driver, gets a lot of miles (About 15000 in the last year) so I want it to still retain the comfort, whilst upgrading things a little here and there. Will be my first time changing things like this so any tips for polybushing the car would be appreciated.
-
I am struggling to find bushes by any of the above manufaturers that should fit on my car. Please can someone share a link if they have one? I need both bushes for the front lower control arms. I think part numbers are: 20204SA000 for the front bush 20201FA120 (Right) and 20201FA130 (Left) for the rear bush in housing. But please correct me if I am wrong, or there are others that will fit. Thanks