

Jay762
-
Posts
9,867 -
Joined
-
Last visited
-
Days Won
208
Content Type
Profiles
Forums
Events
Gallery
Store
Premium Membership Discounts
Subaru Videos
Subaru News
Posts posted by Jay762
-
-
Try Sky as well
-
Wotcha and welcome - Love a hatch me 😍
-
Hi - Modern diesels are not good for short urban journeys so given your situation and requirements I think, unfortunately, you would be better selling it as to keep it and not use as designed you could end up incurring more cost to fix blocked DPF's etc which would take the shine off the sentiment very quickly
-
From what I have seen posted before your suggested approach is correct - cut a larger portion away at the panel to get access then repair, weld new panel in place once inner repair is completed - Trying to think who posted pictures of this approach??
-
There is a red classic for sale in Wolverhampton - very clean motor not standard by some margin, chap worked at Pole Position, not mine but I had a look over it when looking at a clutch. wants 6k though
-
Wotcha and welcome!!!
-
Headliner is easy to remove, get some trim removal tools and take your time, the x3 plugs in the rear are plug in plug type so dont just stick you tool in and lever - you need to pop the larger top bit first to unlock them. Dont know about the badge - Think I read somewhere it was stuck on but you will see when you remove the trim for wrapping
-
 1
1
-
-
cars being broken on facebook or main dealer as dependent which bits you want they get broken
-
Representing in the F1 Lotus stylee
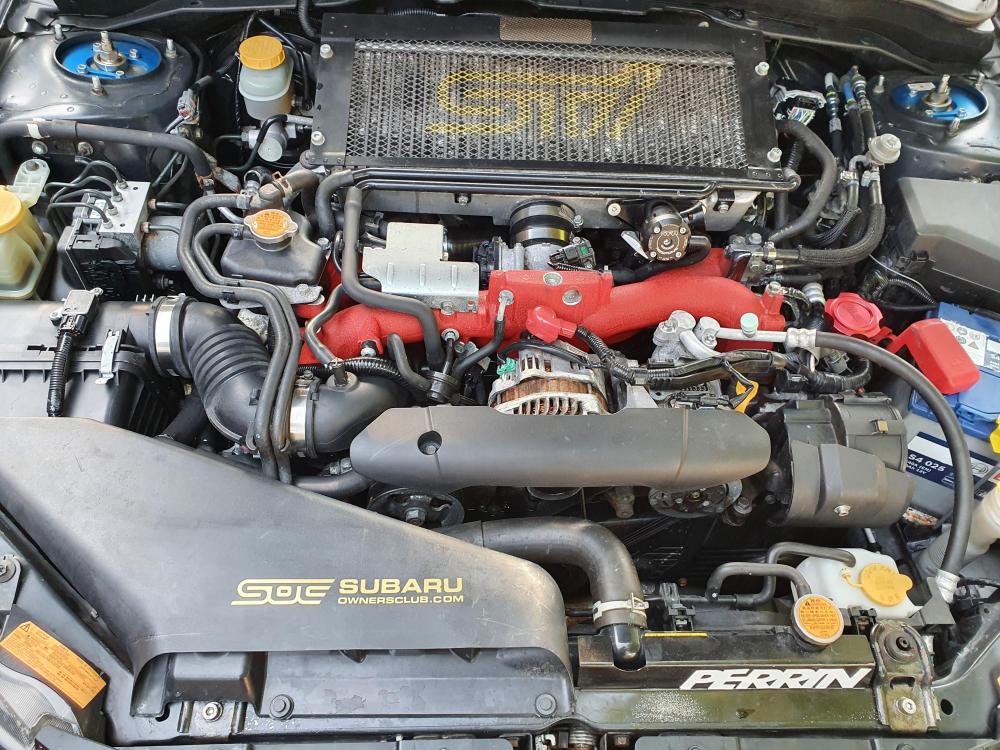
Think that Perrin sticker will have to go....
Plus the force is strong with this one...

-
1
-
-
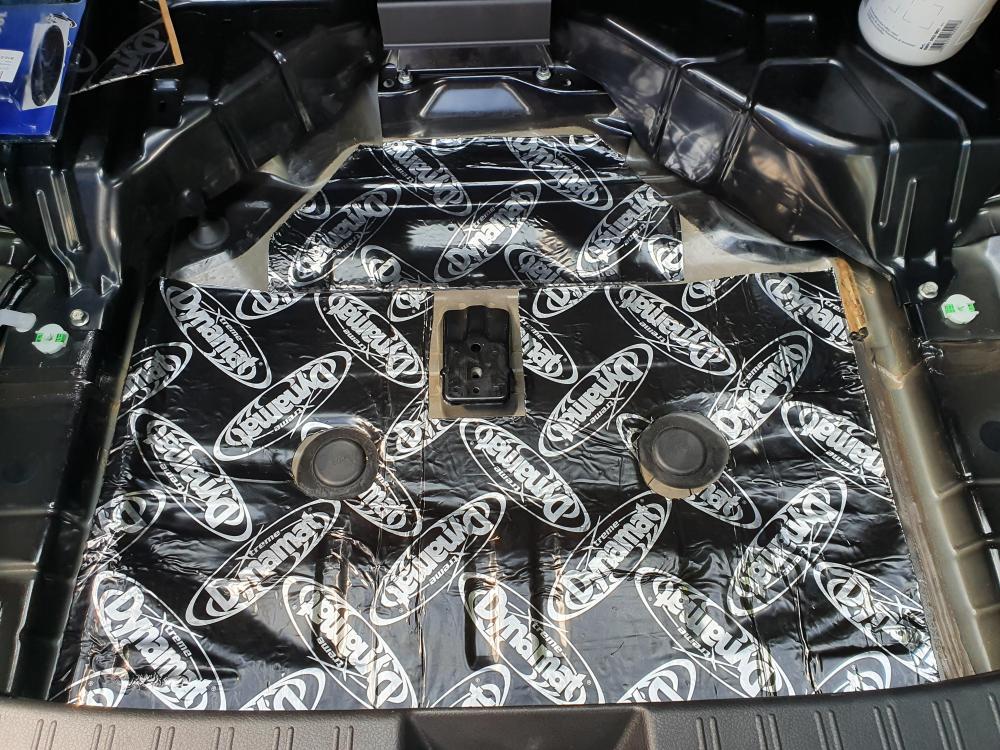
Dynamat in the boot to replace the lift Subaru plate
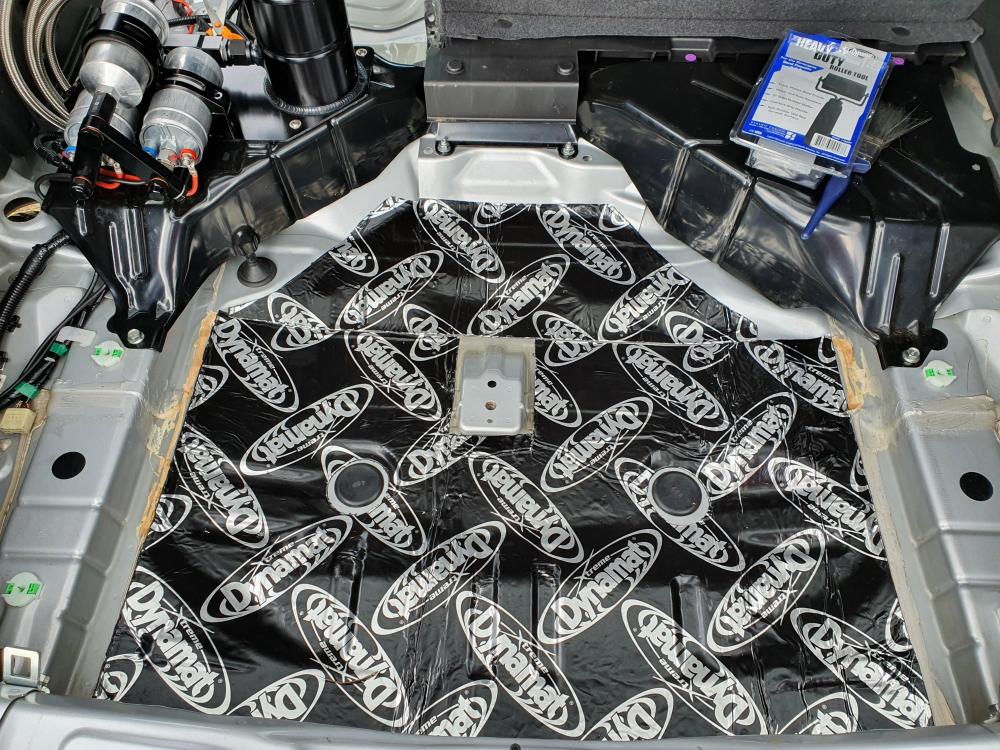
Also did under the rear seat as could not only put half Dynamat and half Subaru stuff...
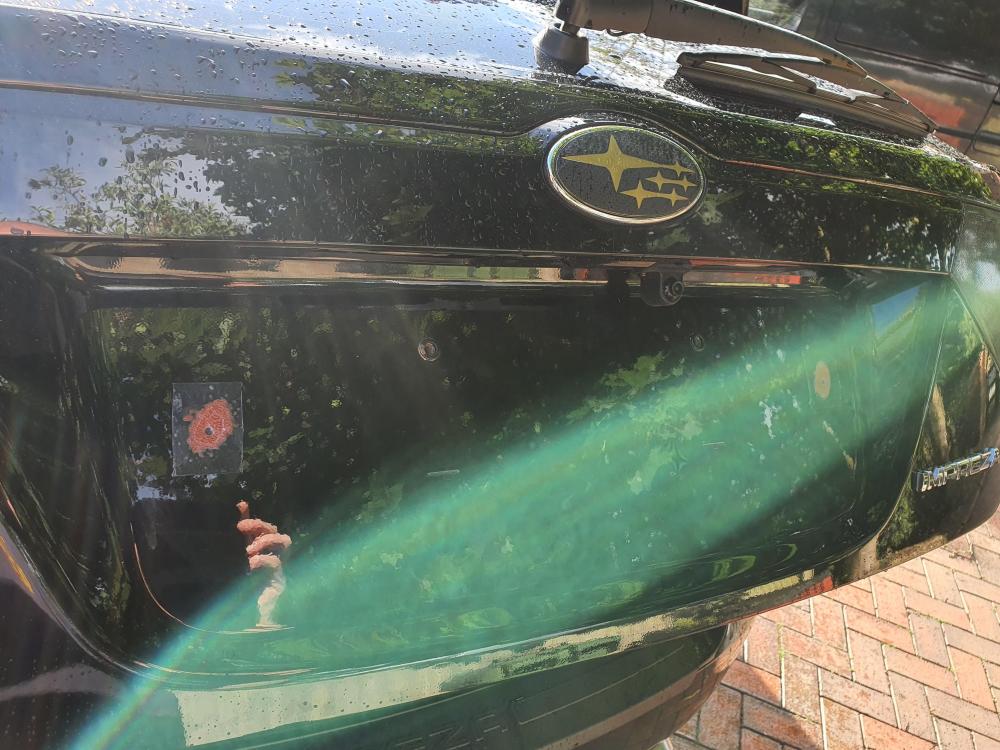
Stripping it off - Yuk
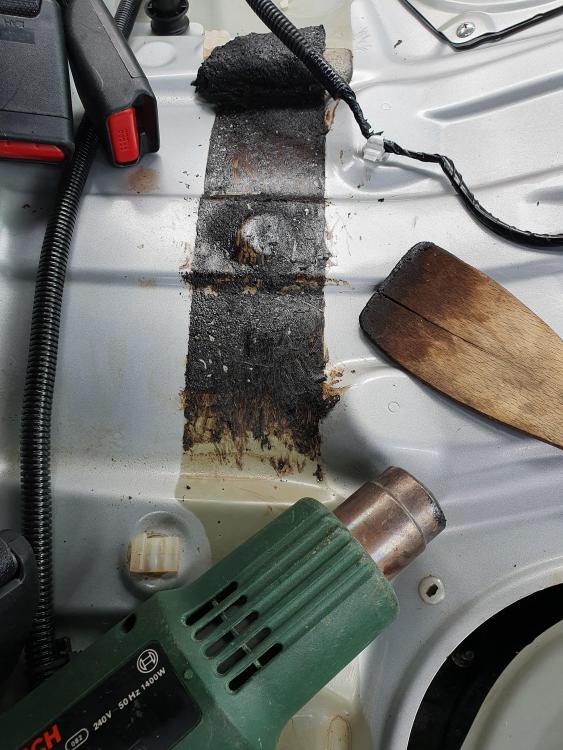
Lots of brake cleaner to prep
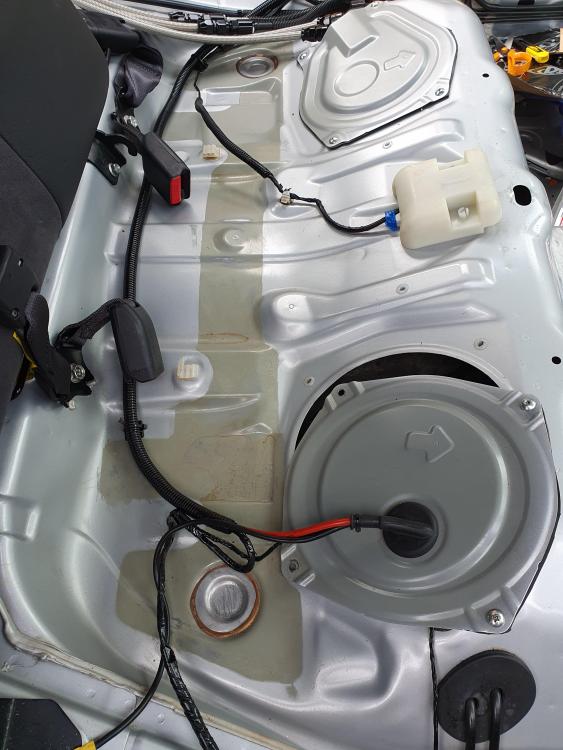
After
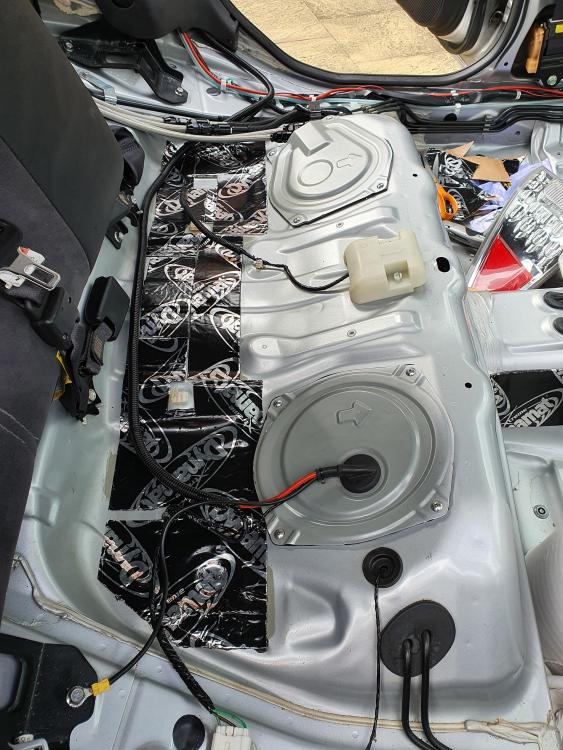
Progress - the boot is actually fully reassembled!!

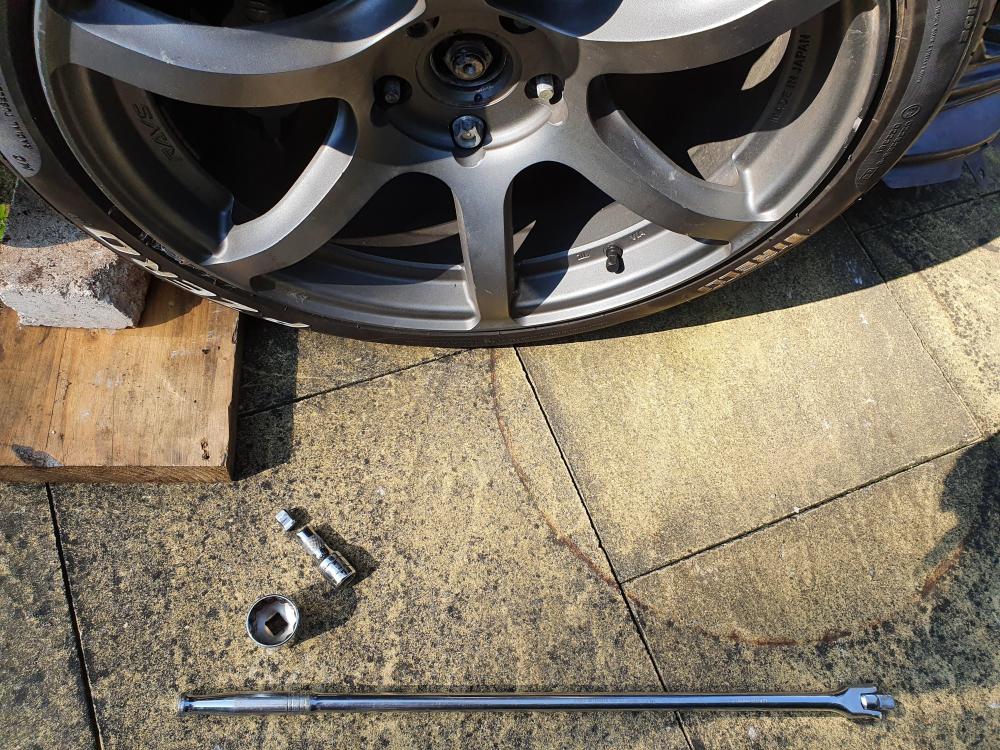
Axle nut 3 - Halfords Advance 0
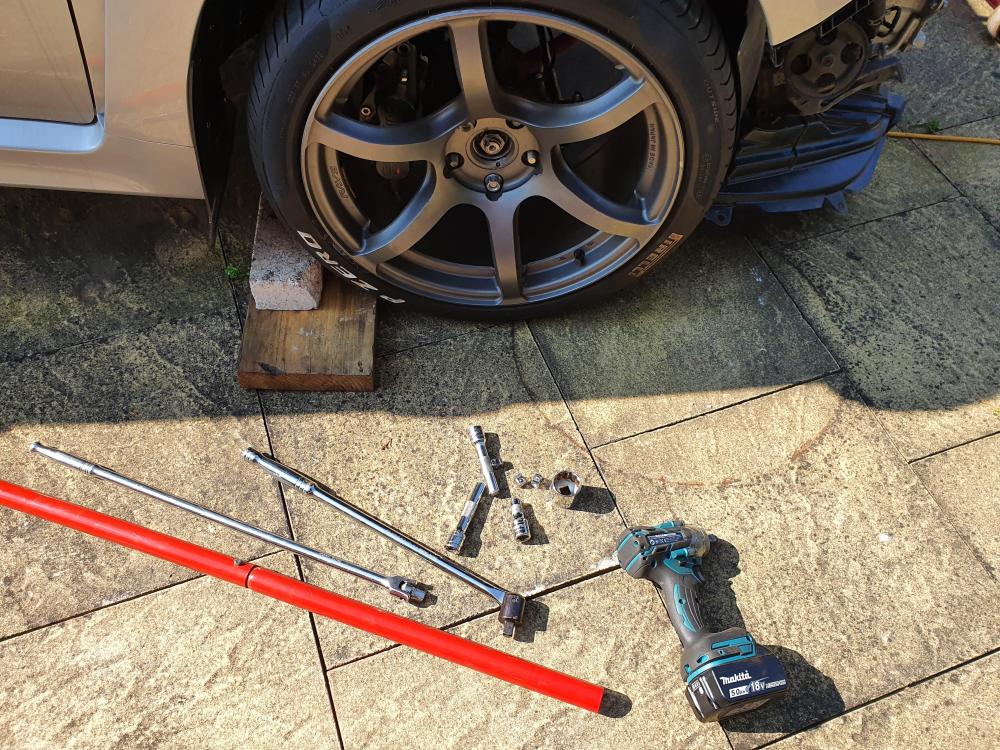
Halfords replaced all the items no problem - Just to point out the extensions were not being used with the rattle gun, a bit of coaching from @savage bulldogs + some swearing and it was free. Now to see if the bearings will separate from the hubs so I can fit the longer studs.
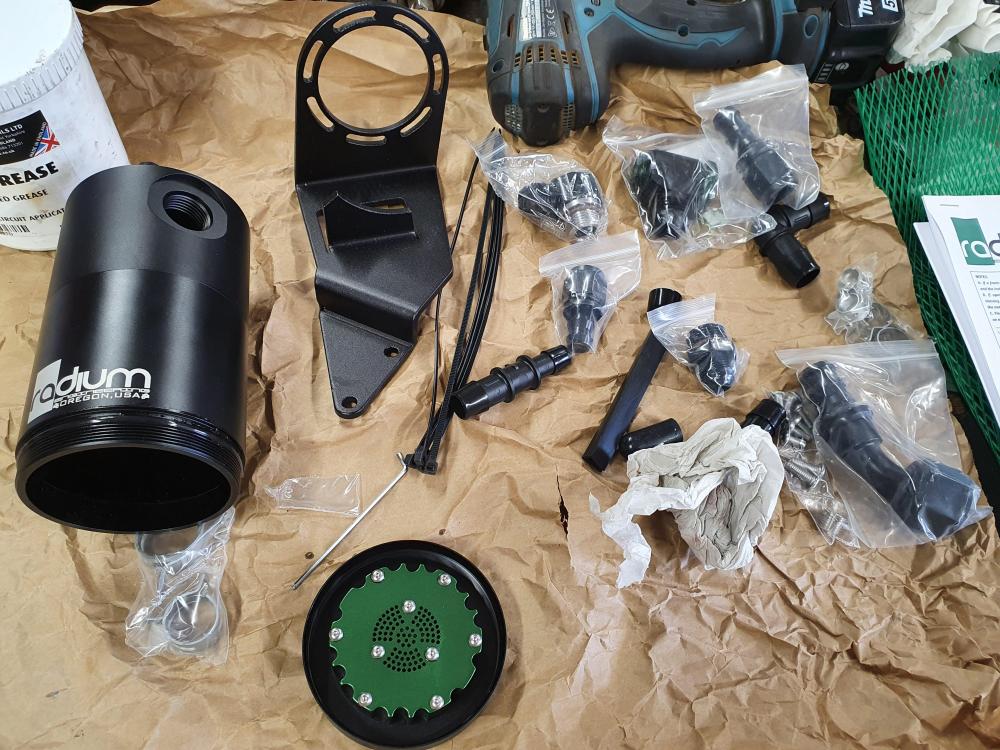
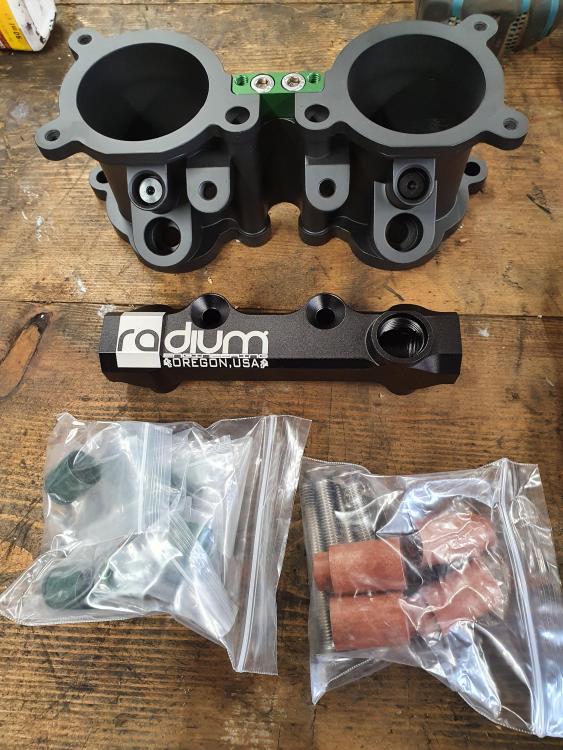
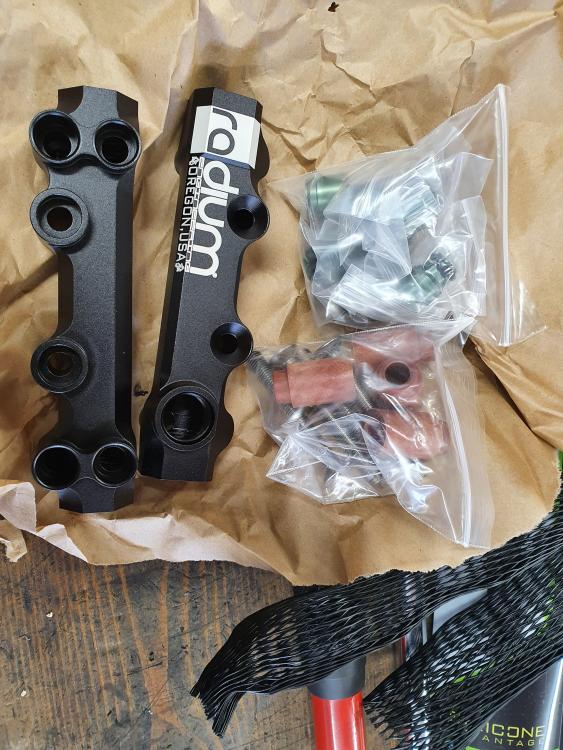
Parts for the fuel system and AOS have arrived - just need to confirm injector sizes, this will mean I can remove the Subaru damper setup completely and simplify plus ensure zero oil goes into the intake. Some initial planning about location completed but a little hard to gauge when your engine is missing

-
1
-
-
Sounds like you are starting to get to the route of the issue
-
Wotcha and welcome - Any mods planned, feel free to share photos start a build thread, all friendly on here
-
Wotcha and welcome - being based in Plymouth you have some decent Subaru expertise on your doorstep with Martin Jefferies, Im also sure @Mr B is located in that part of the world - a wealth of experience
-
1
-
-
Wotcha and welcome!!
-
Wotcha and welcome - keep us posted on your progress 👍
-
Wotcha and welcome!
-
Thats it NASCAR setup has been corrected looking forward to being able to turn both ways with equal stability 😁
-
 1
1
-
-
Yup - not seen the like of it on my other hatches and the amount of dirt I hosed out from the sills front and rear leads me to believe this has been sat under water for some time, it managed to get in places you wouldnt expect it to? But hey ho it will get sorted next year 😊
-
Wotcha and welcome - What model are you looking for, modded, standard?
-
looks awesome - do you need the brakes at all?
-
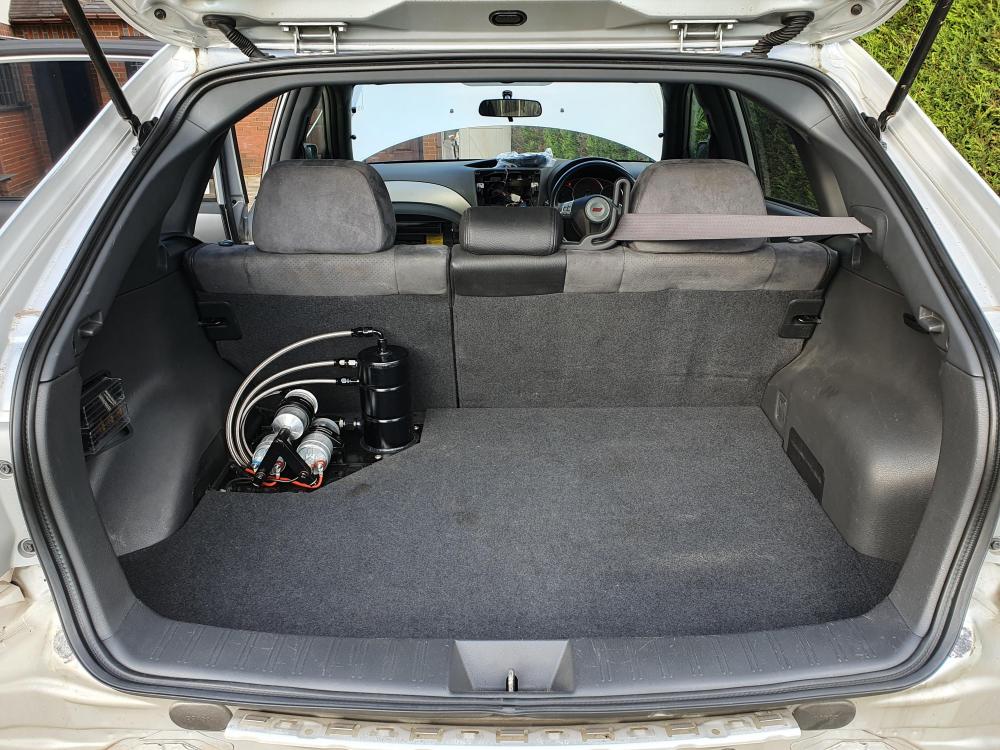
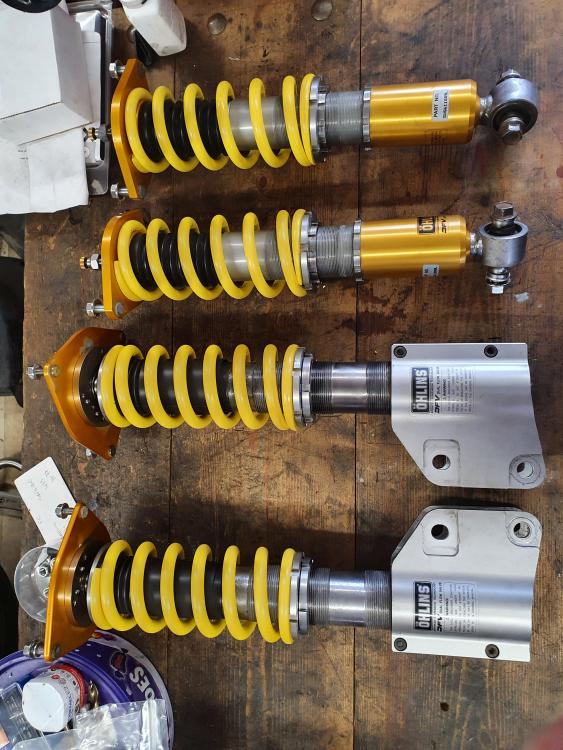
Not a huge amount of progress... See project Daphne but parts arrived from Sweden so coilovers reassembled.
Boots cut to correct length before assembly should avoid the rubbing against springs and tearing
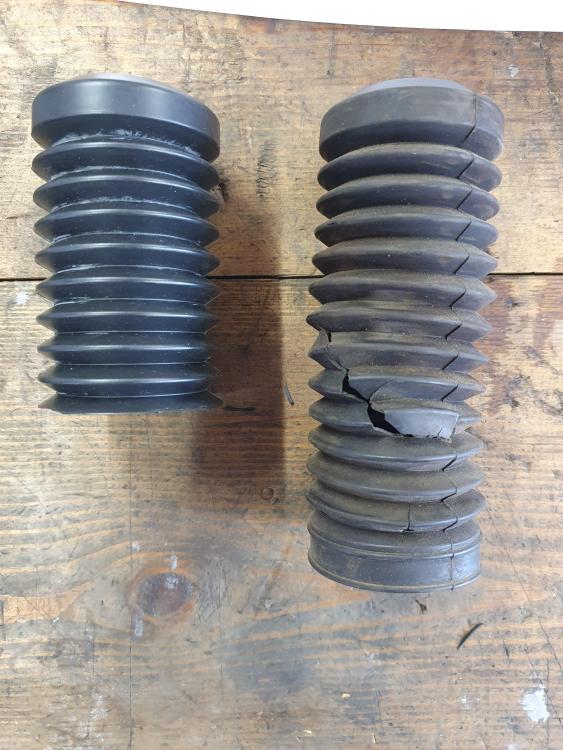
Ready to back on the motor....With correctly matched springs and front dust boots in place
-
1
-
-
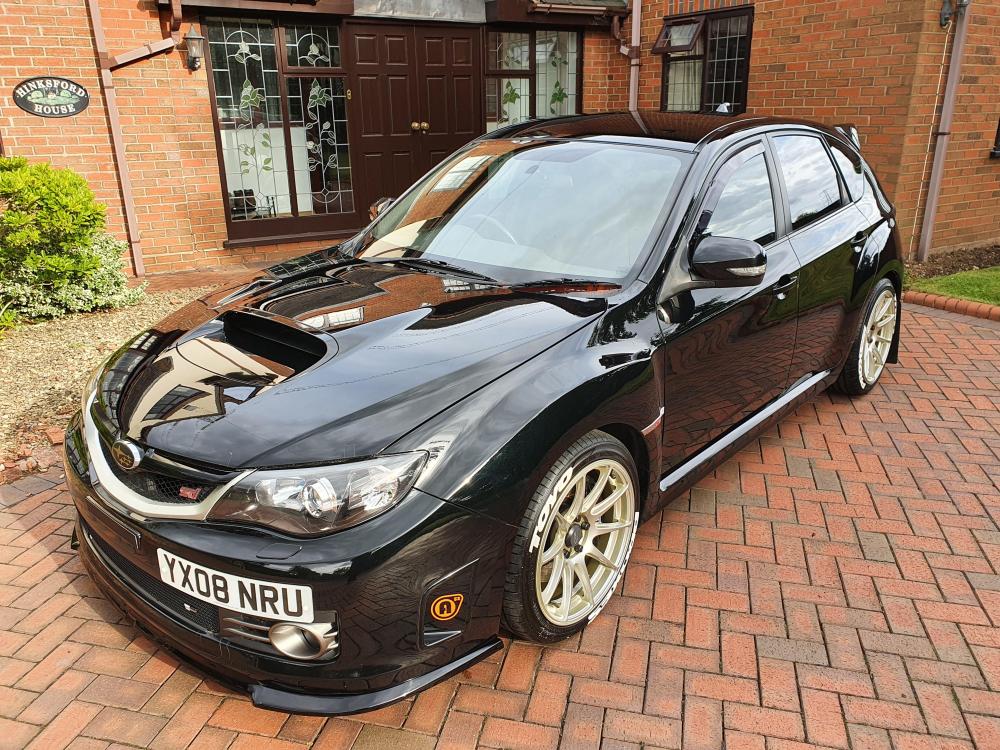
Basic once over completed.
PIAA wipers fitted
Uprated high beam fitted
LED sidelights fitted
Cosworth Panel fitted
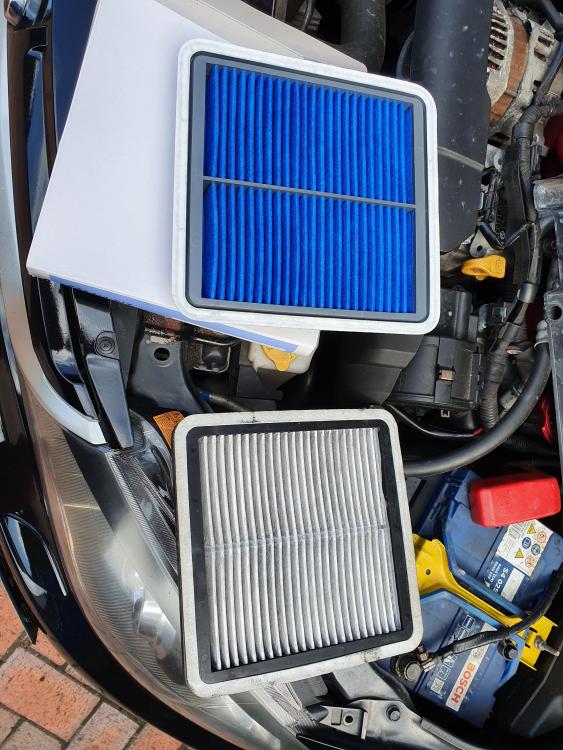
Pollen filter changed
Dynamat lined the boot floor replacing the Subaru sound deadening panel that had lifted due to the oil leakage
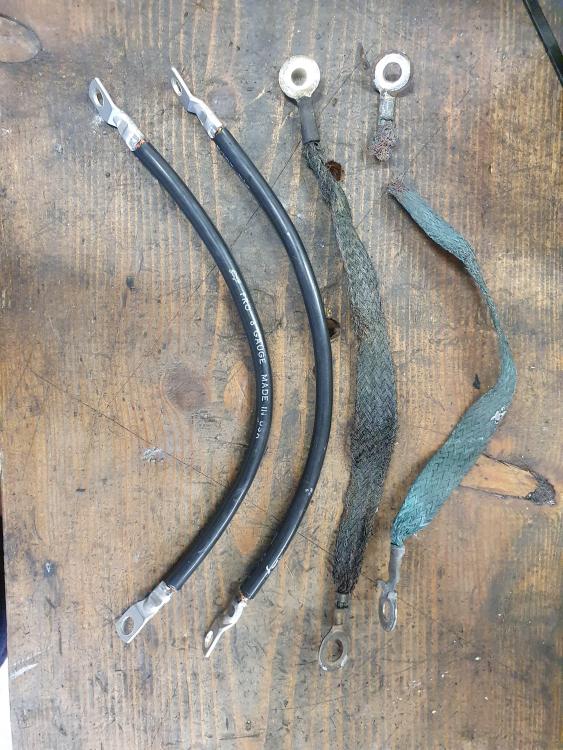
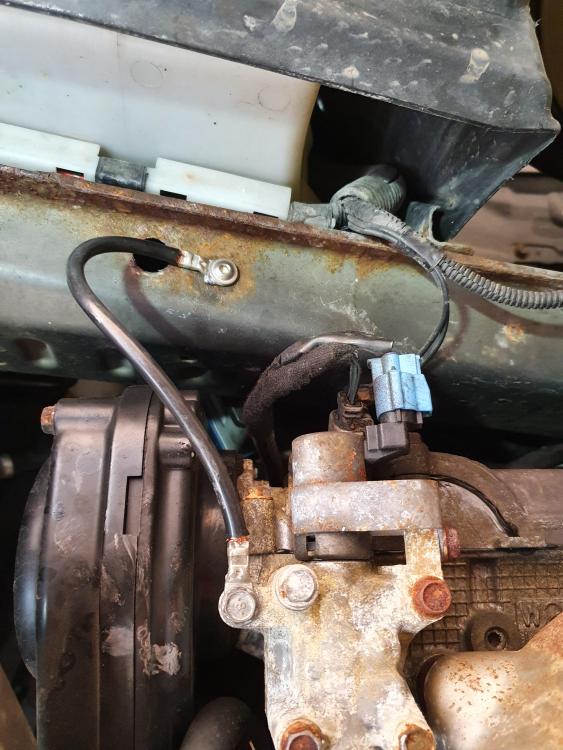
Earth cables had disintegrated so made up some new ones with some amp cable
Engine oil and filter changed - Intention is to repeat every 5k from when 85k is reached in 3k time
Front Diff Gearbox and Rear Diff oil replaced with Motul 300
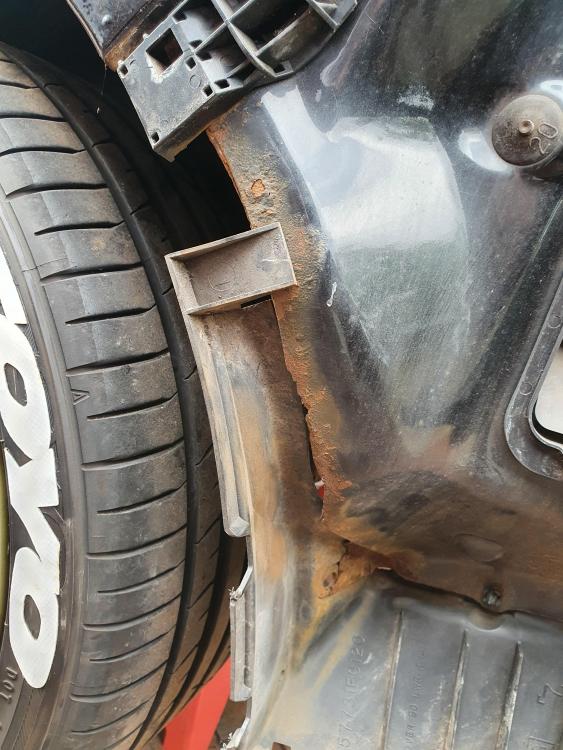
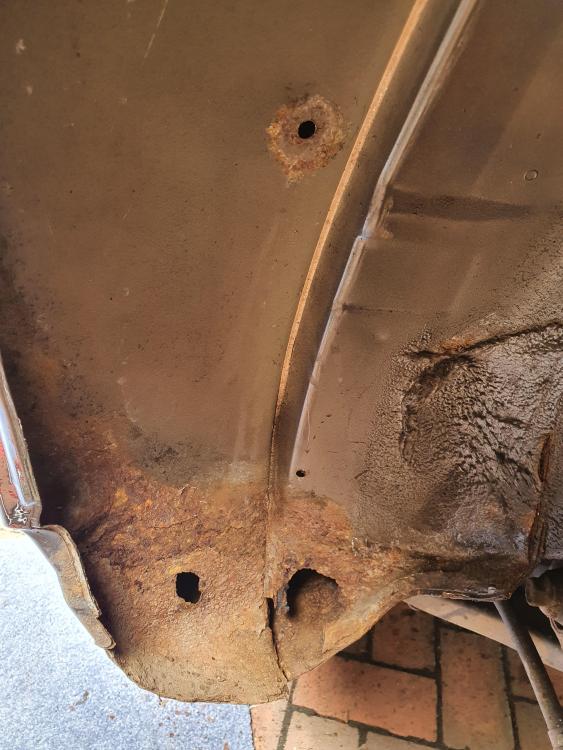
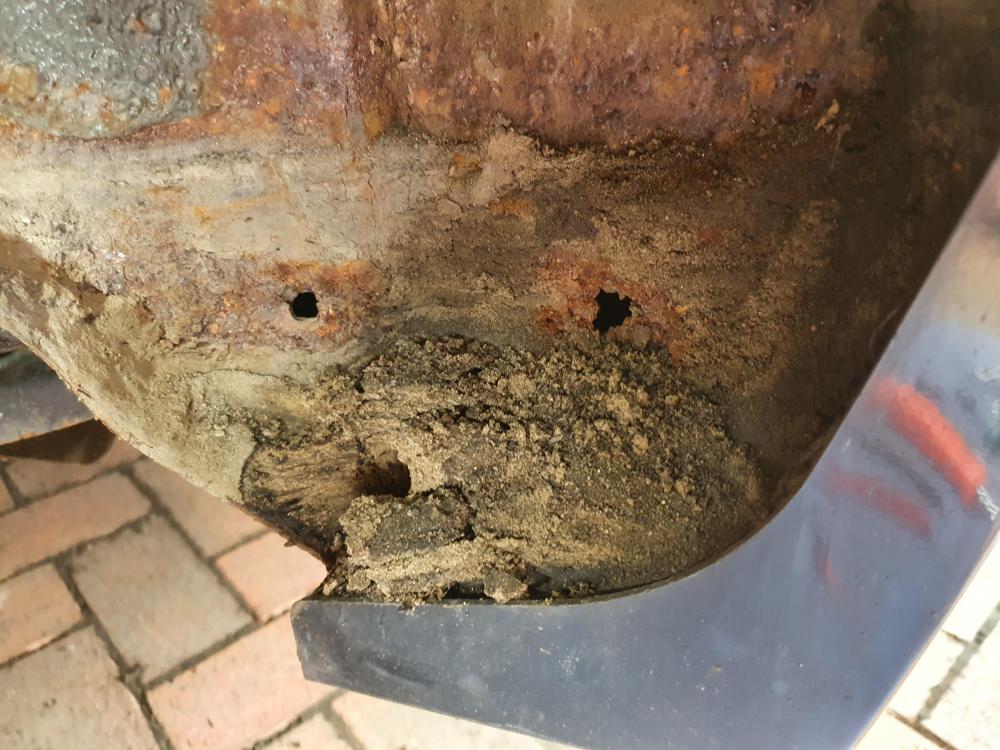
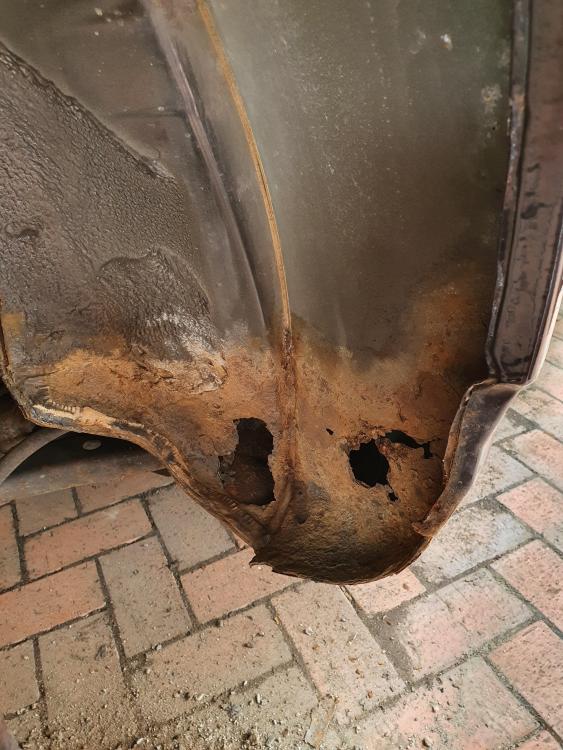
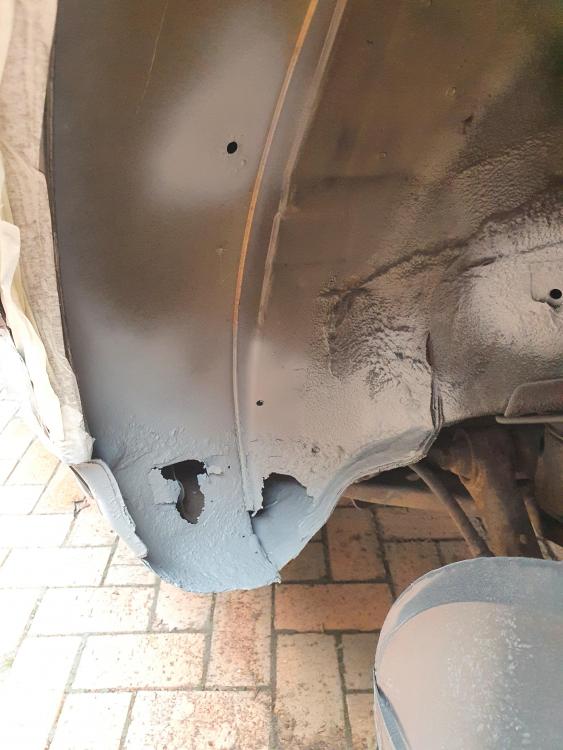
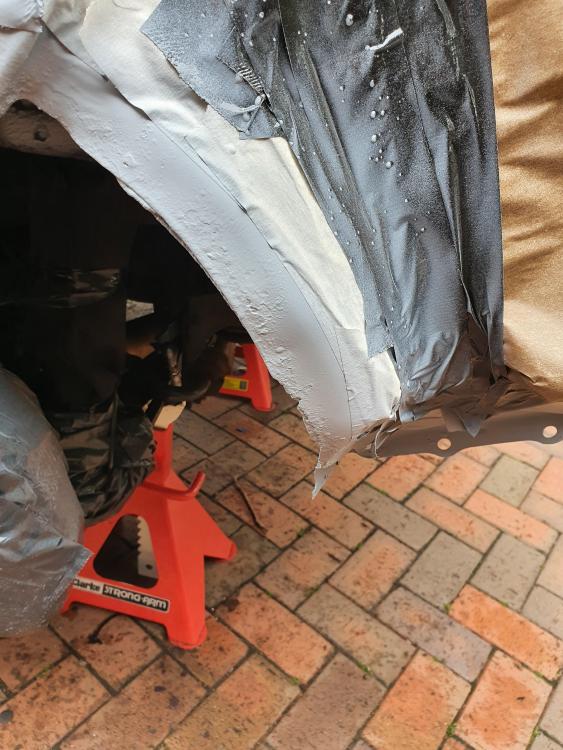
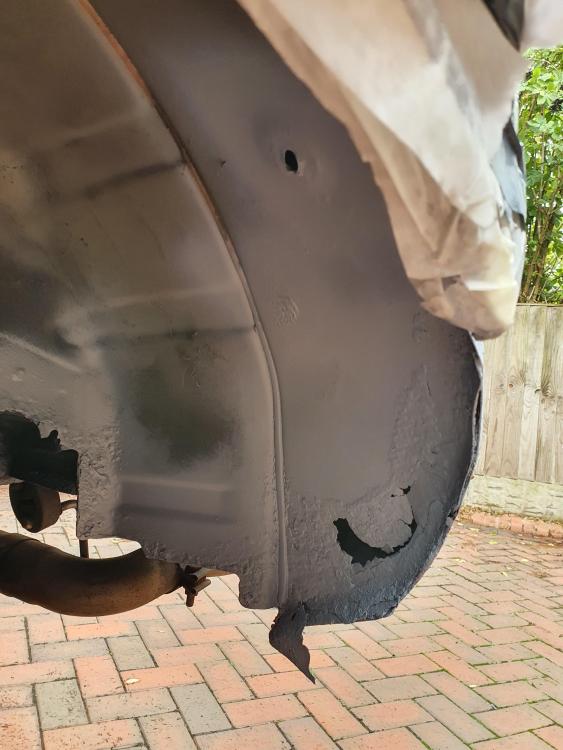
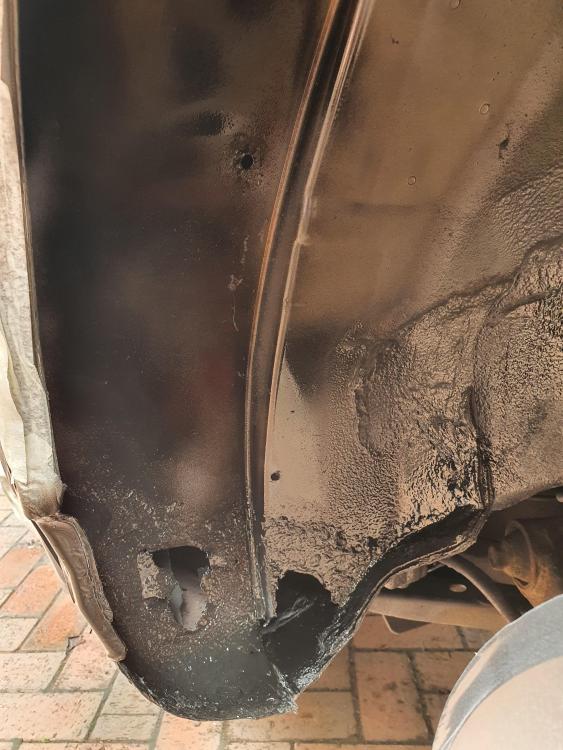
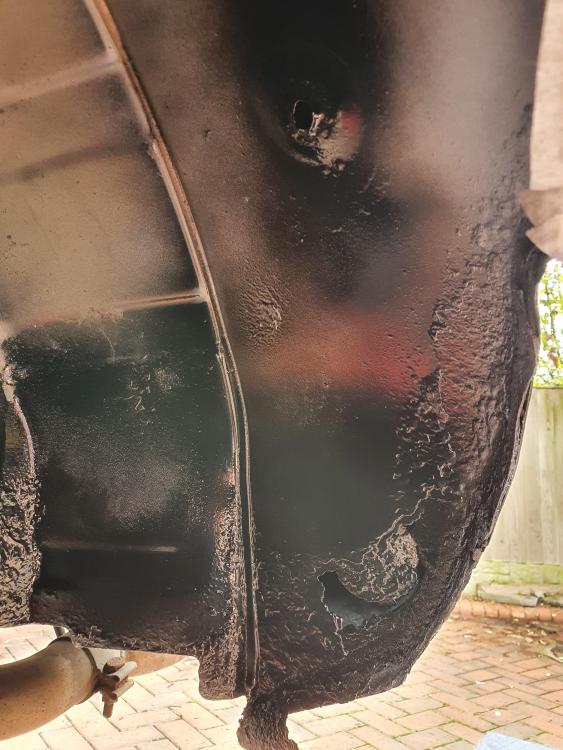
Started to adjust the ride height and hear a crunch as the jack met with the rear lifting point..... I dont think the £200 on underseal was preventative maintenance, the amount of mud in places I have not seen on my other hatches leads me to think it has been caught in a flood at some point
I will get the sills and arches repaired next year (Once Silver hatch is available) but in the mean time, wire brush followed by zinc primer then black hammerite paint to restrict the spread somewhat and get through the winter
Cossie Panel
Earth cables old and replacement
Rust
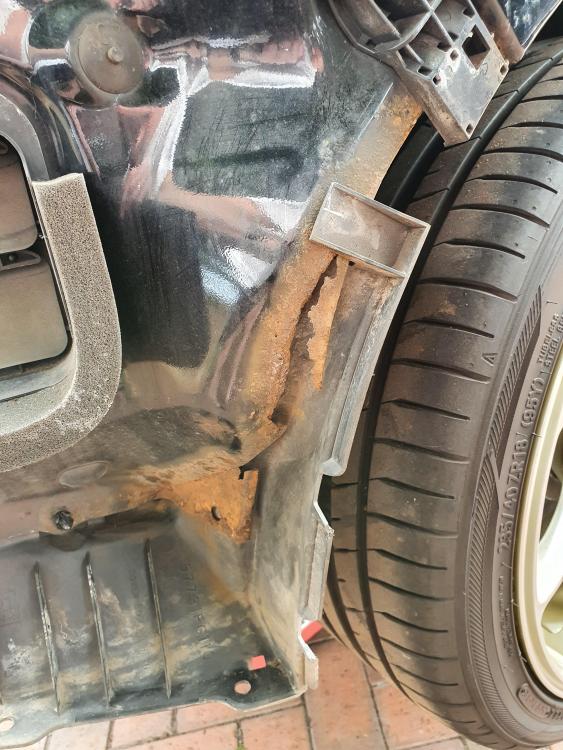
Primed
Painted
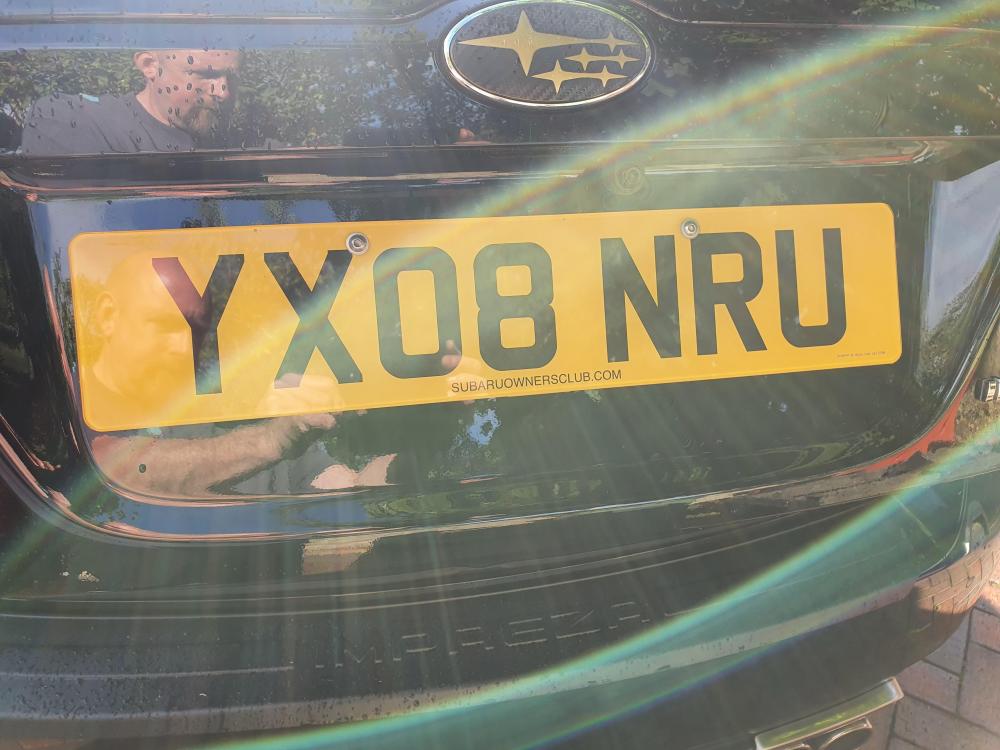
Moved the fog lights from Dotty to Daphne as being a daily more likely to get used and means I can put some brake cooler ducts in place and added a Zunnsport grill to hide the fact a little that the fog light plastics had been chopped along with a large portion of the front bumper to aid airflow to the FMIC on Dotty, plus a new numberplate - representing the S.O.C now.

Winge time - This is the second Hatch this has been done to - How hard is it to drill x2 holes in the right place instead of x2 in the wrong place which then start rusting!
x2 holes rusting under the paint - Oh and a reversing camera I installed - forgot about that, also replaced a defective interior mic for the hands free kit

Wirebrushed, Kurusted, red oxided & 3M taped to help seal
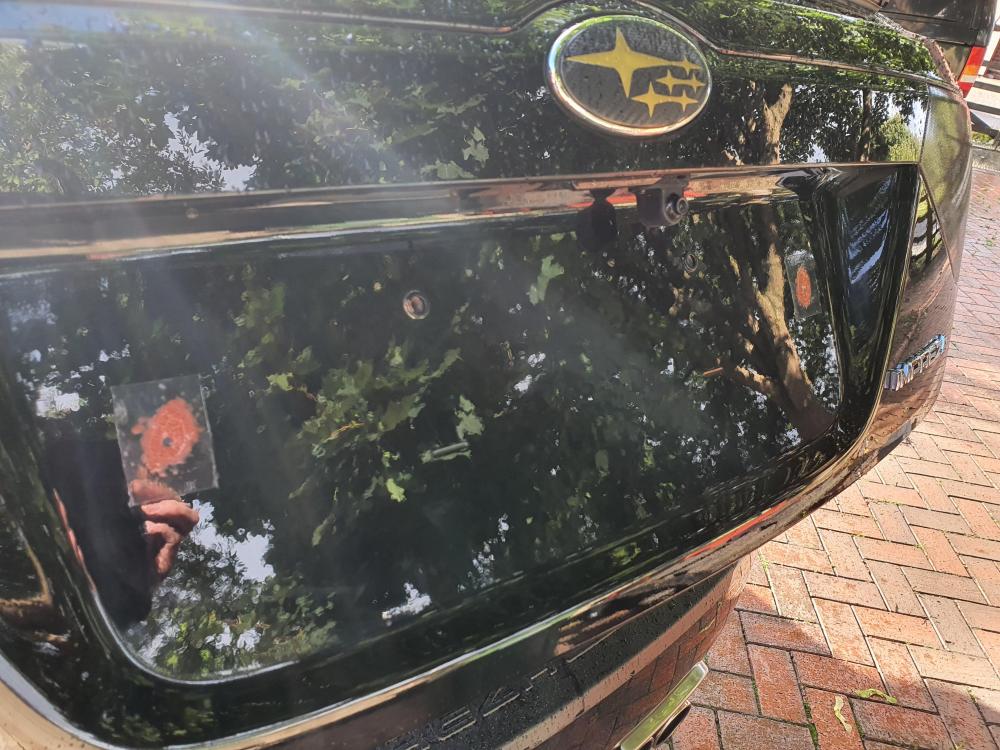
Number plate mounted with x2 holes aligned to the manufacturers pre drilled and tapped items - Its not rocket science and doesnt rust
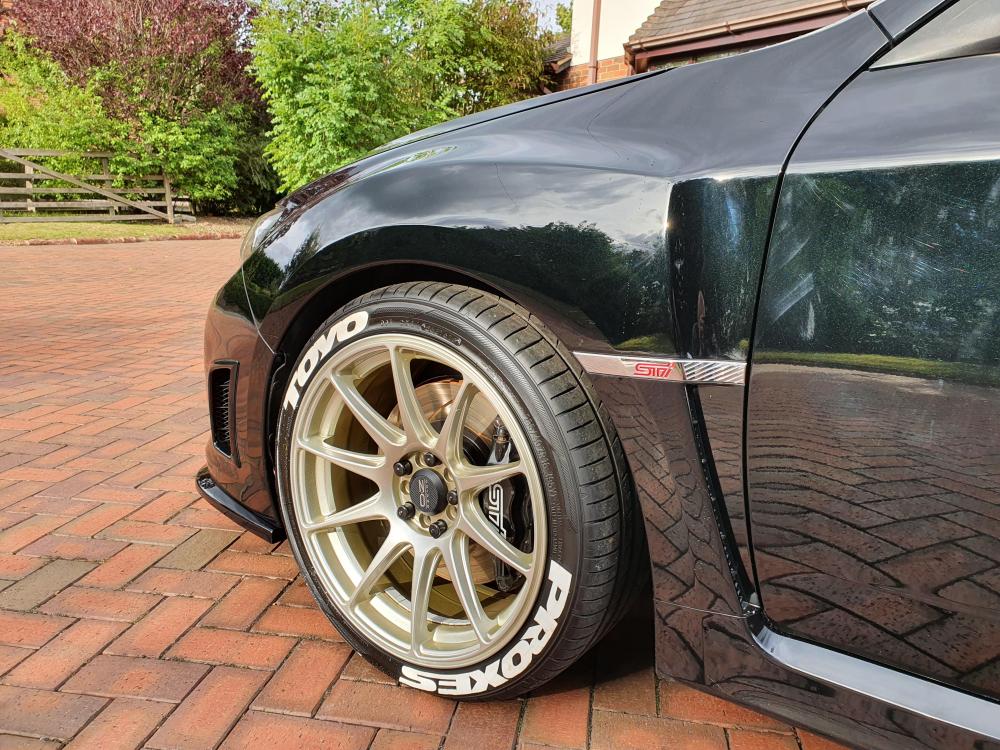
Managed a headlight polish / de-glaze detail and partial paint correction - !Removed! rain showers and years of car washes meant I could not get as far as I wanted - New ride height, standard on rear, 10mm drop up front.
Also removed the Perrin wing risers for two reasons:
1. I kept hitting my head on the hatch which does not open fully with them fitted, no I am too old and stupid to learn so at the point it actually put me on my knees decision was made
2. At a certain speed the wind noise created is ridiculously loud
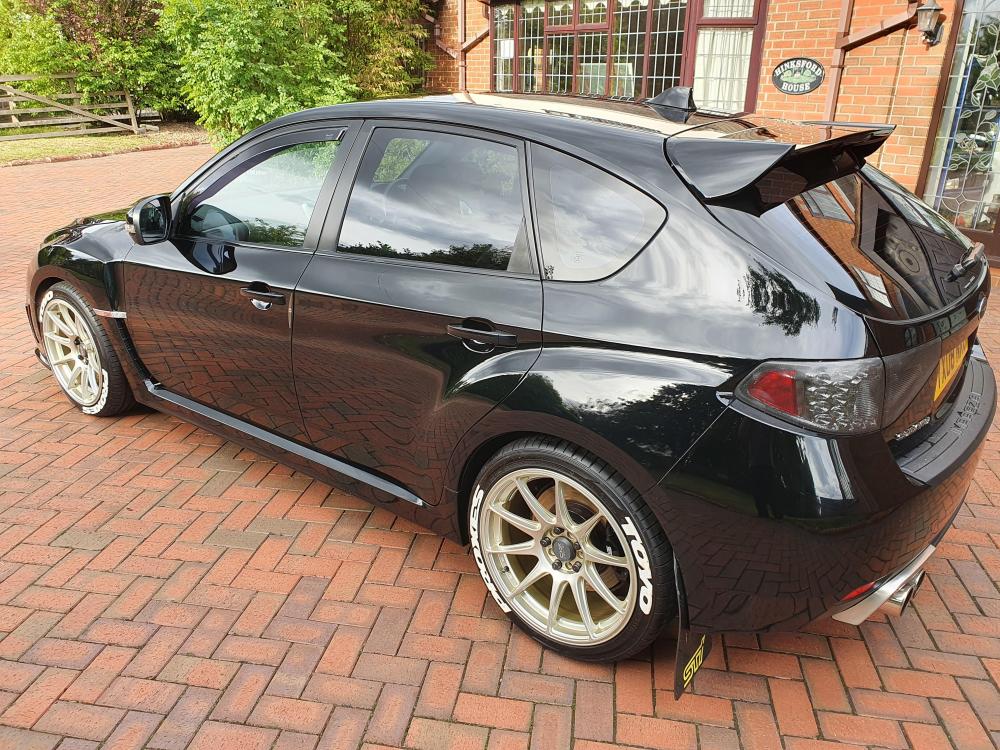
Boot dynamat lined
Old and new lamps
The 20Twenty LED indicators whilst canbus friendly flashed too fast so will be replacing with some alternates when they are back in stock. Have also replaced the rear fog and reverse lamp with the same 20Twenty lamps (white) with no issues. High beam is the MTEC product proven before to remind the chelsea tractor drivers they have high beam on

-
1
-
-
Some info was shared on FB today - exhaust recommendations Peterborough area. These are the following answers
https://www.waltonmotorsport.com/contact/
Amersham way
https://www.facebook.com/A-TM-Engineering-135268766543890/
Norfolk
KMR Motorsport fabrication in NorfolkNorfolkBicesterPeterboroughTelford - probably a little far for youYork - even furtherWisbech-
1
-
-


Intro and a note about my VW conversion project
in New Members Introductions
Posted
Wotcha and welcome - Interesting project.
WRT the guess what it is....
Renault Alpine V6 turbo?