NGBZ
Members
-
Joined
-
Last visited
Everything posted by NGBZ
-
Stock (except for master cylinder brace) 2016 VA engine bay...
-
As per aucky's post - do you feel any judder through the pedal when braking? If a disc is warped, the offset disc will push back on the pads and transmit a 'pulse' through the fluid back to the pedal. If you don't get any pulsing, then un likely to be a warped disc. Of course, there is also a possibility that a balance weight has come off. Try rotating the wheels (front to rear) to see oif that eliminates the issue. If it does, then probably an imbalanced wheel. If the problem remains, then a hub issue is more likely. You could check to ensure that the hub face is clean. Any corrosion etc on the face 'could' mean that the disc and wheel do not fit properly which would put them out of alignment. Take off the wheels and discs and give the hub face a good scrub with a wire brush. Ensure the mating surfaces on the discs and wheels are also clean.
-
These cars seem to be prone to suffering from firewall flex. Essentially, the brake master cylinder assembly is attached to the firewall (between the cabin and engine bay) and over time, with pressure on the brake pedal, the wall can flex resulting in a soft feel on the pedal. Fairly well documented issue with the STi and most people do this (as have I) - May or may not be the cause of your issue, but something to consider?
-
Check that the alloys aren't damaged. Had a similar issue on my old Legacy. Wheels all balanced but wobble at higher speeds. Upon closer inspection one rim was slightly buckled after hitting a pot hole.
-
Initially, I was going to whimp out and get this fitted for me but pride got the better of me in the end and I decided to do it myself... Ordered mine from https://www.pro-wholesale.co.nz/ in Tauranga. There are other makes on the market, but I liked the fact that you can fit this from inside the cabin with no requirement to go under the car at all. Plus it's easily available locally. Instructions are pretty clear but only show up to a 2014 vehicle so they obviously need to be updated as this kit will fit MY 2015/16/17. First step is to remove the centre console. Lift up the armrest and remove the small mat in the stowage bin to reveal 2 mounting bolts. Remove these with a Phillips head screwdriver or a 10mm socket... Prise off the handbrake cover to reveal a third screw which also needs to be removed... The console can then be carefully moved back out of the way... After unscrewing the gear knob, the gear lever surround comes out next. Gentle pulling backwards and then lifting up from the rear... Don't pull too hard as you have a wiring connection for the illuminated STi logo. This can be discionnected and the surround put to one side... Next up, remove the two off white plastic retaining screws to release the rubber boot... This simply pulls up over the lever.... You are then presented with this... Next up, you need to remove the reverse lever. GFB provide a nice 'pin remover' tool to make life easier. This uses a pin remover screw to push out the roll pin.. With the pin removed the reverse lock cable will drop down and will be picked up later. You can then underdo the 12mm nut and bolt holding the linkage to the gearstick. Then a pair of circlip pliers is used to remove the circlip retaining the gearstick cup/ball... After cutting the cable tie which holds the cable to the stick, the stick assemble can be pulled up out of it's socket. Here are the old and new... And with the relevant parts swapped across... The new stick is then fitted, circlip added and reverse lock cable pulled up into place so the roll pin can be refitted. The supplied tool is used again, this time in reverse... I used some new silicone grease to lubricate any moving parts. 12mm nut and bolt are refitted and you can now adjust the throw to suit your preference. Unscrew the bolt on the clamp with the supplied allen key - slide up to shorten the throw and down to lengthen. Just make sure the linkage rod does not hit the metal surround frame in 1st gear.... The trim is then refitted. However, I did hit a small snag with the gear lever surround. With the gear lever now sitting further forward, I couldn't get the surround/leather gaiter into place over the stick. I ended up simply unclipping the leather gaiter from inside - unclipping the black plastic tags and removing the gaiter. With the stick in 4th gear, the surround can be just slotted back in place (remember to reconnect the wiring loom). The leather gaiter then simply clips into place. Job done - and time for a test drive... Must say that is a much easier job than I envisioned. Minimal tools required and doesn't take the car off the road for too long. The result? Does exactly what is says on the box. Throw is shortened from 80mm to 50mm which is just about right for me. Car feels a lot better for the shorter shift and is one of those extremely worthwhile mods.
-
Half way through fitting a Cusco master cylinder brace this afternoon and a courier rocks up with this... Santa has come early this year
-
Have read on a few forms that brake pedal travel can be affected by the master cylinder moving due to some flex in the firewall. General concensus is that it can exacerbate over time and while it is unlikely to be an issue on a new car, I thought I may as well add one anyway. Ambulance at the top of the cliff sort of thing. Ordered mine from https://www.japanparts.com/parts/detail/45710 There are other makes on the market such as Perrin, GrimmSpeed, etc, but these are for LHD vehicles whereas the Cusco one is for RHD. So, before you go and buy one, ensure you get the correct type for your vehicle. Note the instructions, while containing photos, are in Japanese and the only English writing states it is for use in Japan only. Not elsewhere in the world - probably a warranty thing? From what I've read elsewhere, the LHD version is a real PITA to fit with brake lines etc needing to be moved out of the way along with the intercooler having to potentially be moved also. Fortunately, the RHD brace is pretty easy to fit with only one nut/bolt posing any issues. So, without any further ado, a fitment guide... The brace... Don't aks me how, but I managed to lose the red annodised stopper before I even started. So I used a stopped from the end of a G clamp. Essentially the same - just not red and shiney! 2016 WRX STi RHD engine bay... Below, the red (10mm) and blue (12mm) arrows show the two bolts which need to be removed with the green arrow showing a pre-existing hole which will also be used to secure the brace... Bolts removed... This pic shows where the 20mm spacer is fitted along with a replacement longer internal hex socket cap bolt.... This bolts into where the blue arrow is above.... A new bolt with nut and spring washer is supplied and fits into the existing hole (green arrow)... Finally, a longer replacement bolt is fitted to the bracket (red arrow).... While the red and blue arrow bolts are nice and easy, the new nut/bolt is a little tricky due to restricted accessibility inside the strut tower. I ended up jacking up the car to gain better access and then put the bolt through from inside the tower, the spring washer and nut being fixed inside trhe engine bay. While it was a bit of a pain, I was doing this on my own as this can be a one person job. However, life will be much easier and quicker with a second pair of hands. The zinc coated bolt head is the new bolt mentioned above while youi can see the internal hex bolt which has a captive nut already in place from the factory.... You can make out from the instructions that the face of the plate should be 45mm from the end of the master cylinder. All that remained was to add the bolt and stopper along with the securing nut (not visible behind the brace) along with a little threadlock to snsure it stays put... With a small socket set and a spanner, you could knock this out with two people in about 15 - 20 minutes. Yet to go out for a test drive, but will report back later.
-
-
-
-
-
-
-
I've had mine for about 4.5 months now and just about to hit 8k. No regrets at all Disappointments? Not the quickest in a straight line. Would have been nice if Subaru had upped the power in its latest incarnation. Seats. Full leather with the Limited version and very comfortable. Wife likes the heated option. However, they are not that snug and really need more lateral support for when you are pushing through the twisty parts. They could also do with being a little lower too IMHO. Interior isn't too bad but is let down a little in some areas. The handbrake boot, for example, looks very cheap. Headunit isn't too bad but is let down by the sat nav which isn't as good as google maps. Wing mirrors. Fold in with the press of a button but would have been nice to set them to close/open with ignition on/off. Stock exhaust is too quiet and the boxer rumble needs to be heard - but that's getting picky Loves Sheer raw driving experience. Love the feedback from the steering/chassis - you have to be doing something really, really stupid to get out of shape while driving on public roads. And if you do, then you deserve to be caught out! OK, it's not the most comfortable ride on some roads - but you're not buying a long distance cruiser here when you get an STi. Saying that, it's not as back breaking as some make it out to be. I'm driving 2 hours to work and don't get out feeling exhausted. Good brakes. Nice roomy cabin that easily fits 4 adults in comfort for long journeys and 5 for short trips. AWD system and ability to have input via DCCD. SI drive system. Nice to have choice betyween 3 settings. Auto wipers and headlight functions. Though pretty much standard on most cars these days. Not sure it gets cold enough here though for the wiper de-icer fitted on the Limited spec. Spacious boot. Harman Kardon stereo is great. Being a Limited spec means camera in the passemger wing mirror racing forward so no excuse to kerb those alloys when parking. Wing delete option. Personal taste but gives the car more of a sleeper look and attracts less unwanted attention.
-
So, after fixing the leather in place with contact adhesive ( https://www.mitre10.co.nz/shop/ados-f2-multipurpose-contact-adhesive-75ml-honey/p/370182 - which is what I should have done in the first place ), armrest is reassembled... All that remained was to install it into the car. Lowered position... Elevated... Raised... All in all, a pretty straightforward DIY job with a pleasing result. It's the sort of mod that just about anyone could do and simply requires a cross head screwdriver, contact adhesive, a sharp knife and some cushion foam. Though it would have been a lot easier if Subaru fitted it in the first place
-
A piece of cushion foam from a craft shop is glued in place on the top part of the Imprezza rest... The leather trim is then stretched over the top and glued on the inside only, pegs clamping the leather in place while the glue dries... A cut out is made for the latch mechanism and the plastic trim simply snaps in, holdiong the leather firmly in place... I used some spray adhesive initially but despite a long drying time, the edges are lifting in places so will need to use a stronger glue... Apart from that, all is going to plan
-
Unexpected progress :) Tried a local auto upholsterer but he's busy until next year. Then went to another local guy who does auto/furniture but couldn't match the STi's leather exactly so would have to go to a leather supplier to see if I have any luck there. Anyway, a closer look at the armrests seemed to indicated very similar sizes which got me thinking... Out with a philipps screwdriver and a little dismantling showed that the rests are indeed, very similar in size. The obvious difference being the recess for the catch release on the Imprezza part. I then decided to see if the STi leather would come off of the moudling and to my surprise, it did very easily. The vinyl on the Imprezza part was a little harder, but came off nevertheless. I then tried fitting the STi leather over the Imprezza moulding and it justy about fits. Will need a little stretch at the sides, but nothing major. This now makes it a DIY job So, what I have is... A: STi armrest moulding with leather removed, but foam padding stiil in situ as this has been glued to the plastic. B: The Imprezza lower part/mechanism. C: Vinyl cover from Imprezza armrest. D: STi leather fitted losely over the Imprezza armrest moulding. Below is the Imprezza vinyl cover with latch insert. No padding under the vinyl - it's glued directly to the plastic but pulls off easily enough... The STi leather covering the Imprezza moulded armrest part. As I said above, needs slight stretching on each side (couple of mm) and the leather needs to be cut for the latch part... The STi arm rest has some foam padding which is glued directly to the plastic. This won't come off without breaking apart, so need a small piece of foam for the new set up... So, hopefully, all I need to get tomorrow is some suitable leather glue, a piece of foam and should be able to complete the job myself. And save a few $ in the process by keeping it DIY :D
-
Got my hands on a genuine Subaru centre armrest extension. Designed for an Impreza - hence the different interior colour - though fits the WRX STi... Taking it to a car upholsterer this coming week to get it recovered in leather with red stitching to match the interior. Further pics to follow when fitted :)
-
Nice write up indeed. Just about echoes my STi and my own thoughts. As with you, the RS and R were also on the potential list but the STi has far more raw power and feels much more 'organic' overall. I came from a 2004 Legacy GT and while the STi is obviously not a comfortable cruiser, it is still a huge step up - and the Legacy wasn't exactly a slow car either! I opted for a Premium model myself as I liked the full leather option and sunroof but the Harman Kardon sound system helps blot out the road noise when required. The only initial frustration was phoine connectivity. I had a Galaxy S5 and while I could make and received calls, it wouldn't download the phone book etc. Saburu claim that Samsung were at fault while Samsung blamed Subaru. Helpful - not! Ended up replacing with with an S7 and all good since. It may not be the fastest car in a sraight line these days, but as above, it can easily embarrass more expensive vehicles. As a Holden Commodore GTS found out last weekend. And that has a 6.2L V8 with some 435bhp! God I love the STi
-
Been working away from home for the last couple of weeks but arrived back this evening to find a nice little box waiting for me... And inside :D A pretty easy straighforward swap. The original unit pops out (once you can get you hands behind the dash) but only slightly as the wiring loom prevents full access (This is a RHD car). A small jewelers type screwdriver can be used to release the tab holding the wiring connector in place. The new unit simply plugs straight in. Testing before fitting it back in place.... Light turns orange when button is pushed... And goes green when the clutch is depressed ready for ignition... Don't you just love little mods which take only a few minutes but make a such big difference (visually anyway!). Got mine from here - Japanparts.com - JDM Parts,Performance Auto Parts Interesting that the lettering has a different layout to that shown on the site. Shipping took less than a week to NZ Gary
-
My understanding is that the Si settings simply change the throttle maps and don't change the 'power output'. Max boost will not be changed directly by these settings. The throttle is electronically controlled so the Si simply controls how quickly the throttle opens in relation to the pedal position. I agree that compared to other tubo cars I've owned in the past, there isn't that real shove in the back when the boost winds up. That is more due to the fact that ECU maps and turbocharger technology etc has improved significantly over the years and car manufacturers want smooth linear power delivery. Doesn't mean to say the car is any slower - just feels that way due to the way power is delivered. Peak boost in any gear/setting is recorded as 17.6psi (122kpa or 1.2 Bar) on my vehicle. Unless the car mentioned above has been modified from stock, you are not going to see 1.5 Bar unless something is very wrong Heck, I remember the days when I had some 250bhp running through the front wheels of an MG Montego into which I installed a Rover 16v 220 GTi motor. When full boost came on you really noticed it - especially when that torque steer tried to aim you in any direction other than forwards Now it's a case of point and shoot and you don't really notice how fast you are going until you look at the speedo
-
Bought some OEM gloss black AWD and WRX badges to replace the stock chromed ones...
-
This will be next up when it arrives from Japan...
-
Thanjks guys. I was in a state of shock yesterday as my wife actually noticed the change and thought it looked better than the original one!
-
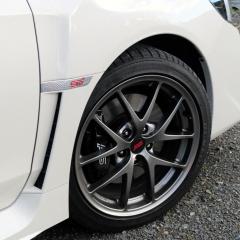
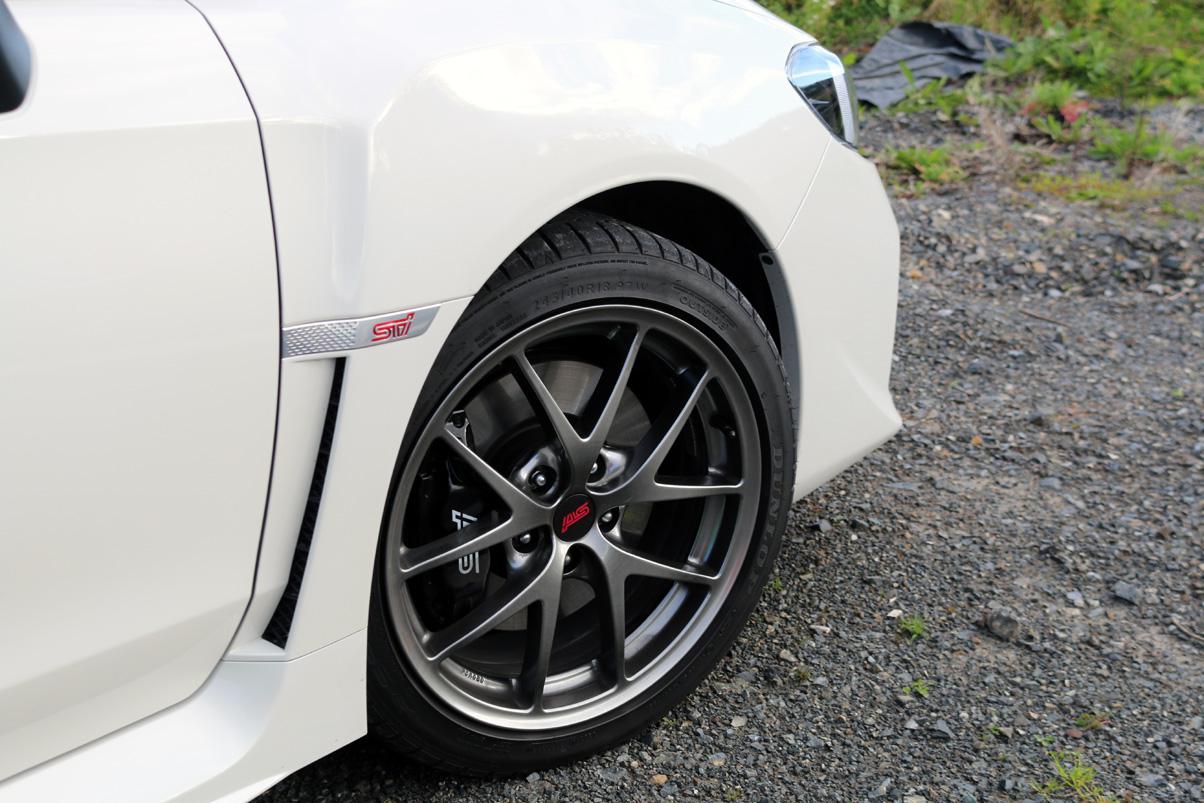
Never really liked the look of the bright silver fender emblem on my 2106 STi and as soon as I discovered another option was available, I ordered a pair from eBay. Initially, they sent me WRX ones in error () but the correct ones finally turned up this morning. Pretty straightforward swap requiring a hairdryer and some cleaning spirit. The original: The replacement: First setp is to heat up the fited emblem with a hairdryer. This is to soften the double sided tape securing it to the fender. You can then gently prise the emblem off - starting at the edge closest to to door: Next, thoroughly clean the mounting surface to ensure the new tape sticks securely. I used some spirit to remove and grease/residue etc. Peel off the tape backing on the replacement emblem: And push firmly into place. There are two small tabs on teh emblem which line up with locating holes to ensure correct alignment.: As with most things, it's a question of personal taste. I think these black emblems totally change the look for the better and at around NZ$25 a pair (plus shipping) one of the cheaper 'mods' out there Gary