salsa-king
Members
-
Joined
-
Last visited
Everything posted by salsa-king
-
got a new cabin filter from euro car parts.. under £18 delivered. maybe I should have swapped it a few years ago.
-
added a go faster sticker last night
-
Now, mark 15mm from the ends and and drill your 5mm hole, allowing room for the fastener to fit nicely against the trim. You can offer up the fastener stud to see where is best to centre your drill bit. with the rest of the Fasteners evenly space the around the SKIRT to help it keep in place, where the shape of the SKIRT started to bend round (where you could cut 'V's into it) I put three fasteners around that arean to keep the SKIRT secure. When you've done all the fasteners.. check the SKIRT is firmly down against the Front lip spoiler. Shame I've previously scrapped the front skirt on stuff :( All I need to do now is get it back on the car... once the A/C is fixed. :) Hope it helps someone fitting their's.
-
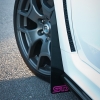
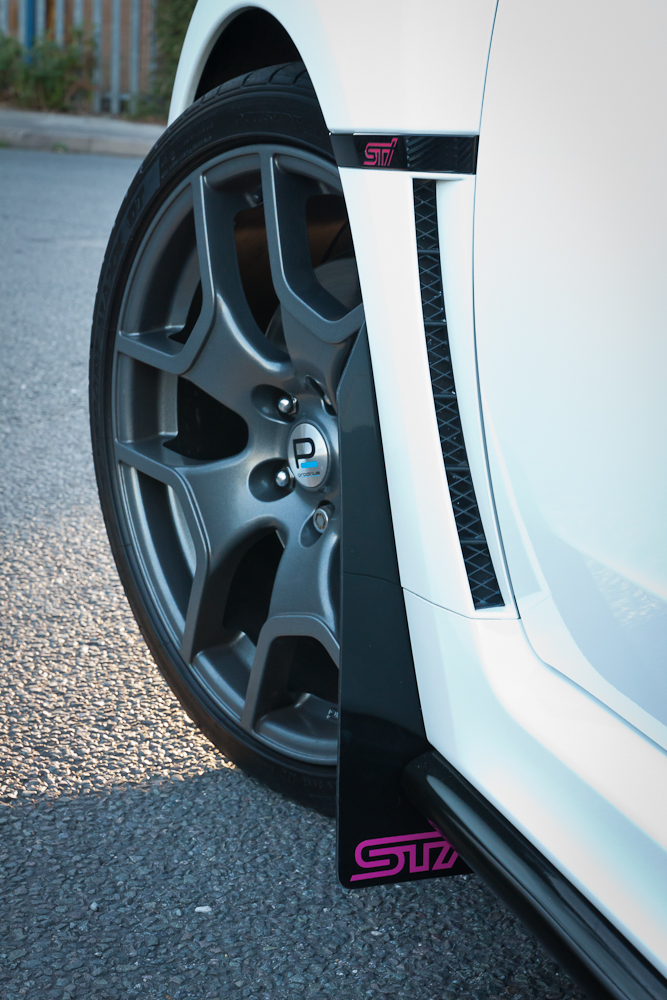
2008-14 STi Front Lip SKIRT (that goes on the front lip spoiler) ADDS another 5bhp, so I'm told I bought it from Japanparts, cost about £50 + the usual shipping and vat + handling fees etc etc Tools needed: screwdrivers to remove bumper clips Drill with 5mm plastic/wood drill bit. fine marker pen and a sharp Stanley blade to trim the rubber skirt. tape measure a cloth + meths to clean the surface. I removed the front bumper so I could get to it easier plus my car goes in on Wednesday to get an 'O' ring replaced on the a/c So used the opportunity to have the bumper off and fit the front SKIRT. Once off, try and follow the Japanese STi instruction sheet best you can. Clean the surface with meths to remove any dirt etc. Mark off the ends where you will cut it off. Keeping away from the curve of the front lip spoiler as your Skirt tape won't stick to the bend. It works out about 1cm from where you can see the curve edge starting to form. Use something to do a straight line, I used a straight edge bit of mud guard metal bracket that I had spare, it was small and straight. don't worry if it doesn't look lined up straight - like mine is. the tickness of the SKIRT won't be effected by this line, your only needing a guide to where to cut it off. In the instructions (as I did have a Japanese friend who read the warning notices out to me) it says about warning the 3m adhesive tape to help it bond to the surface of the front lip spoiler, so i used a hair dryer warning the tape as I applied it (removing the backing bit by bit as i went along the length of the spolier). Line up the SKIRT to the back edge of the front LIP SPOILER. This keeps you at the right distance from the front of the LIP Spoiler. I started one end with the good cut edge, tehn once I got to the other end I cut the excess off with scissors, ready to trim it to size properly. Now, the instruction say you should cut 'V's in the skirt where you come to bends. I found I didn't have any kinks that needed to have the 'V's cutting into the stick on side. Fingers crossed it hold on. I know the MY11 front lips are slightly more aggressive on teh shape, so you may want to cut the Vs where needed. Once all on and you've trimmed the end to the correct size, using the line you marked at the beginning (again I used the straight edge of metal to keep it neat. Go over the whole lot with the warm hair dryer pressing it firmly as you go.
-
After winning 'Car of the Show' at Curborough the other Sunday I thought I'd try my won products out on the wife's car :norty: a nice selection of stuff to use car was filthy, can't remember when I last washed it, let alone Clay bar or waxed it. So here goes. The usual pre wash with cherry snow foam, hand wash and re rinse with weaker snow foam mix was done as normal. on the alloys I swear by AW's Billburry cleaner.. this is the 5l concentration container, I have a solution mixed up to spray on the alloys, allow to soak in..rinse and wash off (use a brush/sponge to get the kak off. next up, pre wash over the car with snow foam and then use the clay mitt (from the clay cloth company) 1st pre soak the mitt in warm water. read the instructions. being the mitt it was easy to go over all the car in about 20mins. you could tell the paint work needed it. - (better than a clay bar? I'd so not much in it other than the clay cloths/mitts are so much easier to work with) then I washed it all down and used the silicone squeegee then the lovely blue soft towel to dry the car off. then when dry, run your hand over the paint work after its been clay mitted... so silky (but paint work was dry as no wax on it. next the engine bay I spray over with traffic film remover (bought from machine mart - 5l of concentrate liquid is about £12 - then dilute and use a plant sprayer) agitate it with a detailing brush, a very quick wash with snow foam and rinse off.. very quickly over the engine bay. Allow to fully dry then I sprayed over with the Silicone wax spray I won. Impressive results.. it looks like new again. next up a coat of Mad Cow Candy wax, you can apply by hand, but as i didn't want it all over me hands I used a micro fibre pad. apply.. leave as long as you like them buff off with micro fibre cloths... finishing off a final buff up with a quick blast of detailing spray as you go, as this removes any last residue from the hand mad wax. looks ace now finished off with tyres... Mad Cow Skimpy Dress... is brilliant.. apply by a sponge.. tyres come up great.. lasts weeks. any last bits of plastic trim (like roof spiler or round wing mirrows etc) I used Auto Finesse detail spray.. the one thats none silicone (the one i usually use on my matt black roof wrap) one happy wife.. and me too. job done.
-
So that's why I don't feel it working
-
If it was going to go pop it would have done it by now.. run on Vpower or Momentum is the best option If you do alter anything like a zort, get it re mapped just to be on the safe side... go to ScoobyClinic and have it properly done. Non of this on road mapping and piggyback map copies or what ever they call them lol
-
I like the cans under the car, why is there like to silencer cans per side (one on top of the other)?
-
i must say i'm loving this zorst at the mo.. shame its in the usa... http://www.arkperformance.com/ARK-GRiP-Subaru-WRX-STI-Hatchback-08-p/sm1301-0210g.htm
-
my 25th anniversary edition Hatch strut brace now fitted (about £25 more money than the normal Red STi version). from japanparts.. took about 3weeks to arrive :)
-
my STi Flexi strut brace arrived while I was away on holiday :) it's the same as the one on the 25th Anniversary Model Hatch STi can't beat proper STi stuff ;0 and the STi lower lip spoiler Skirt's I ordered came at the same time.. pix later
-
save your money.. buy a STi then you can mod from a 276bhp car anyway.. instead of a 220bhp WRX
-
yep, just saw its a closed group ;) only for STi owners :) https://www.facebook.com/groups/414178658747093/ best of luck on the alloys. there are some good value 18" 330s alloys on ebay at the mo too
-
he's come back to me and said you can have the system deactivated at the dealer.. but you have to sign a disclaimer. Or buy the sensors. are you on the UK STi owners facebook page?
-
Got info back from the top engineer at Stan Palmers who has a 2015 STi.. his answer.... Yes they do but will trigger a fault on the TPMS system
-
I'll find out
-
I run a set of Std STi alloys for winter. got them off ebay at great price virtually brand new with min mileage on the tyres. then had them powder coated the colour I wanted for £240 ;)
-
done a bit of hand waxing on my car this evening with the MadCow Candy Wax I picked up at Modified Nationals on Sunday. Applied to all the paint work, I'll let it stand till I'm ready to polish off... or when I've got time to do it again. :)
-
All my photos are here... https://www.flickr.com/photos/neoquip/sets/72157653007268229
-
muppet, how did he do that, cover heated it? you only need a warm hair dryer. soapy water, a vinyl squeegee and hair dryer is all you need.... and a bit of patience. I did mine ok. trimming the edges are the tricky bit ;) I whipped my clusters out to do that. but fitted while on the car.
-
alloys look great, yellow brakes look super. just needs some rear smoked overlays now ;) give me a shout ;) http://www.ebay.co.uk/sch/neoquip/m.html?item=291450056888&hash=item43dbc6f0b8&pt=LH_DefaultDomain_3&rt=nc&_trksid=p2047675.l2562
-
got this on the car yesterday
-
Hi , welcome. get some pix of your car up ;) Were you there person who did the SIDC/TrueGrip write up about HULL's police subarus back in the bay?
-
I removed mine when it came to wrapping over the top edge, still cut it short though lol
-
I didn't get mine very neat at the top edge.. was too tired.. it was too late at night. but have seen it done on a friends car nice and neat. You only need a hair dryer on a warm setting... not all out full heat blast lol