
savage bulldogs
Moderators
-
Joined
-
Last visited
Everything posted by savage bulldogs
-
I'm fairly sure the version 1 &2 wrx's and sti's ran a tdo5 16 g (power difference was created by the map and intercooler flowing better ) im unsure what the early uk's run but my v3 uk came with a tdo4 as standard. vf series turbos came in on version 3 and above sti's. Where as the v3 and above uk turbo's and (i think also) wrx's ran tdo4's . I do know the main differences between the vf's and tdo series though. Tdo series are a journal based turbo's ( basically shaft through the middle which is lubed with oil by centralfrugal force ) they can take more abuse and can be easily rebuilt . Where as the vf series have roller bearings which spool slightly quicker but don't tend to handle to much abuse and can't be rebuilt (as easily)
-
Result glad it worked out for you Bit cheeky charging extra dough for a universal part just because it's for a different motor though ;-)
-
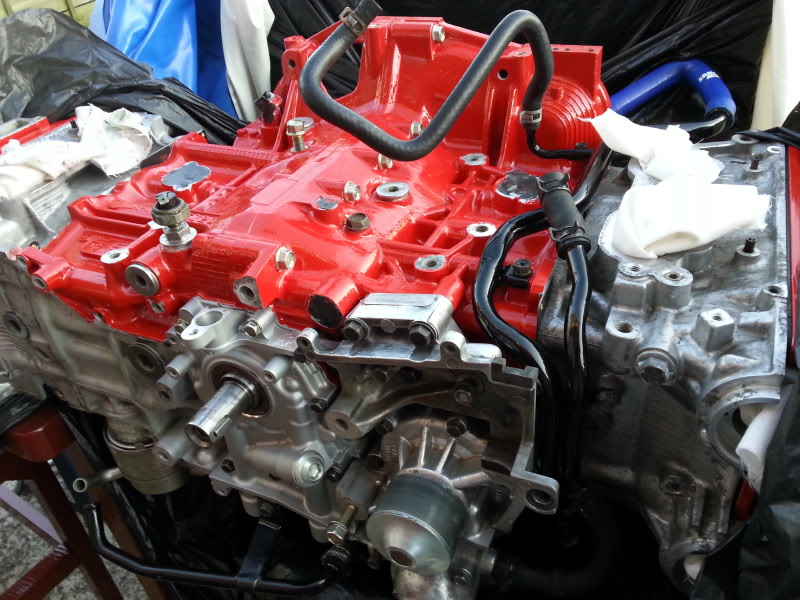
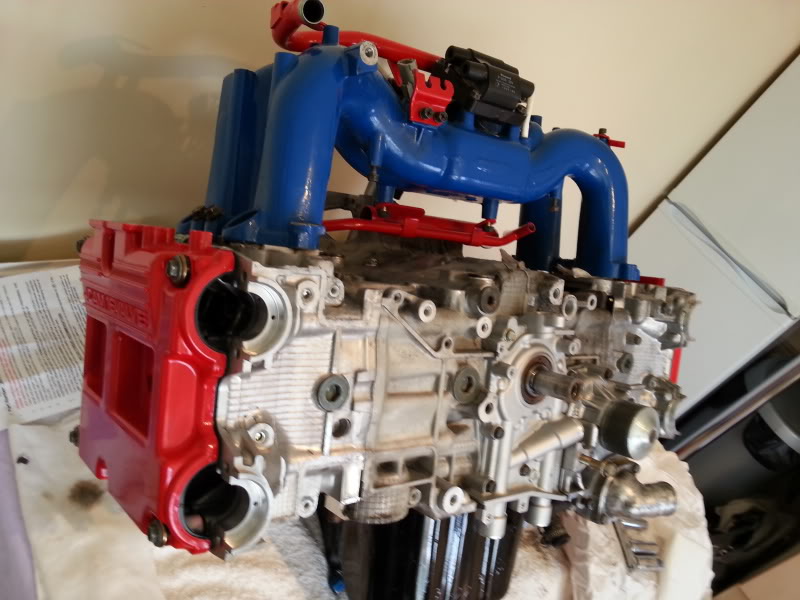
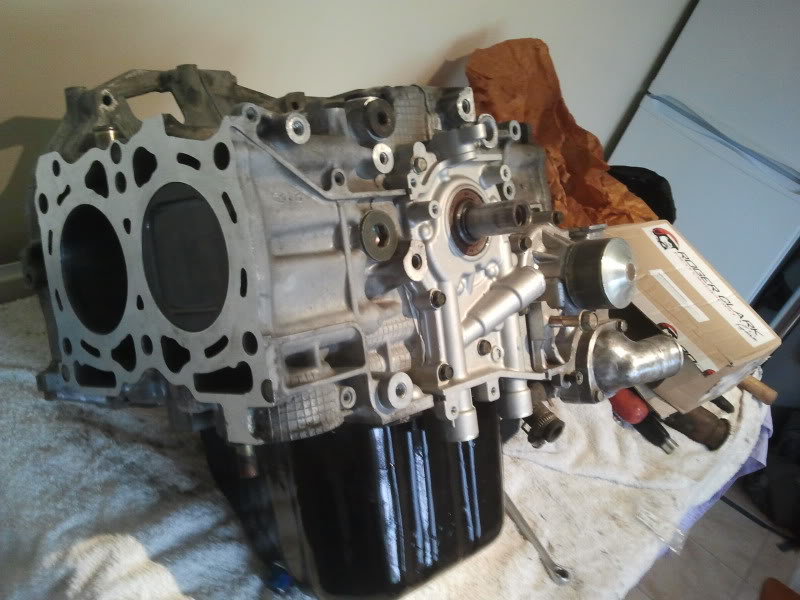
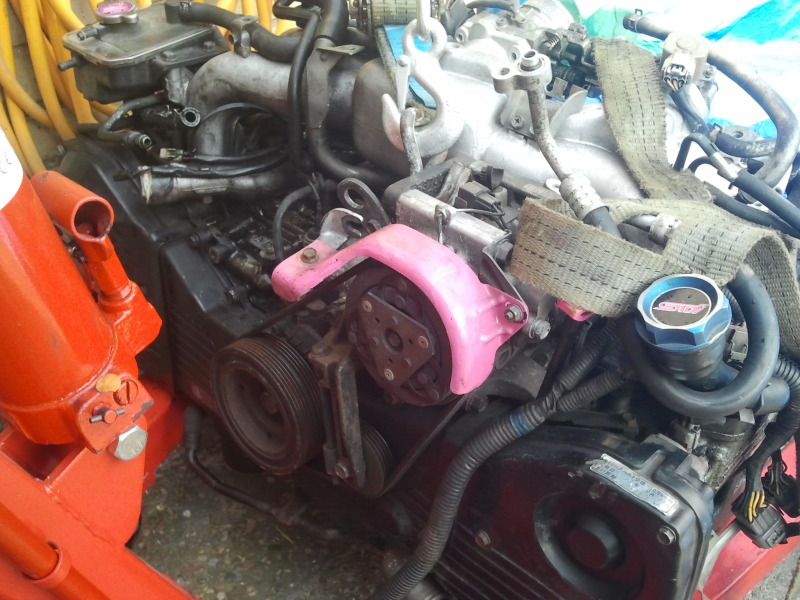
Cheers chap stripped and resprayed the small (black) block water pipes (that come from the water pump behind the cambelt cover),wire brushed and cleaned the bungs/oil pressure sender bevel ,timing belt tensioner bracket,and oil cooler and then fitted them all . doesn't look a great deal different to last time ( apart from having a coat of red paint ) but heres a pic anyways 😉
-
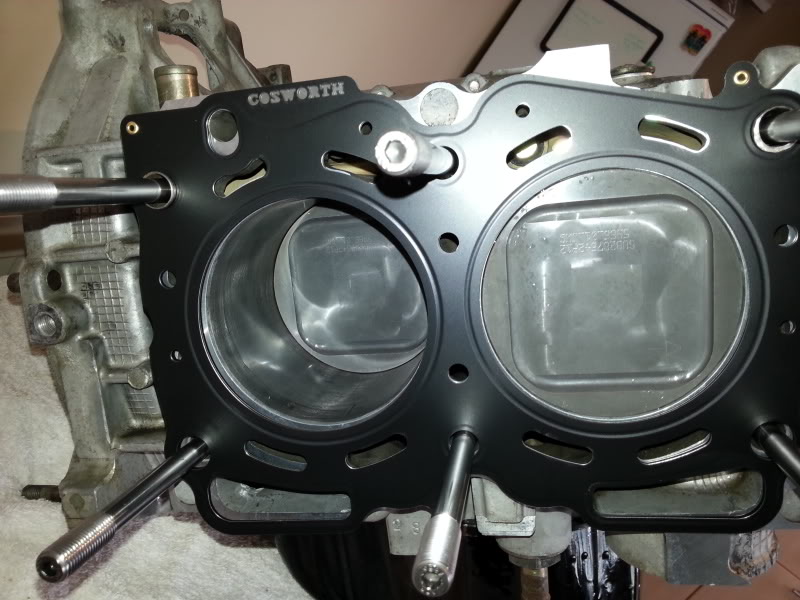
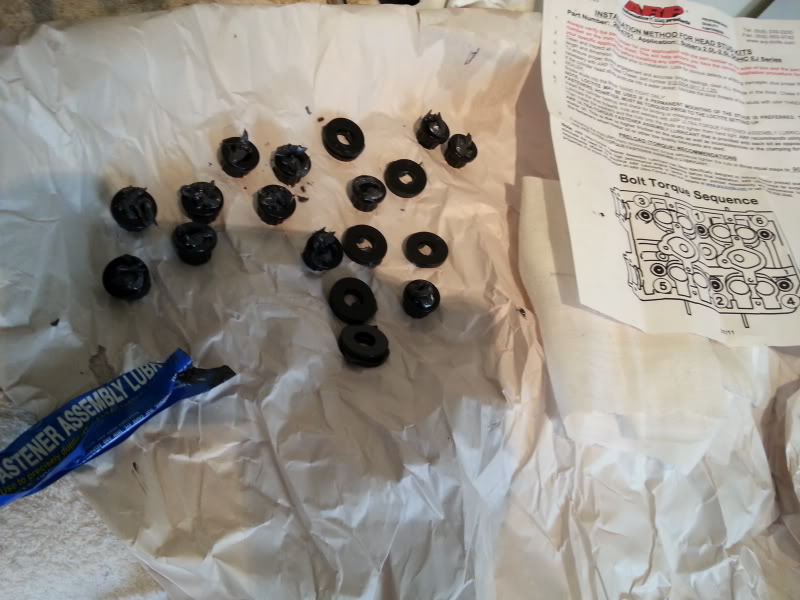
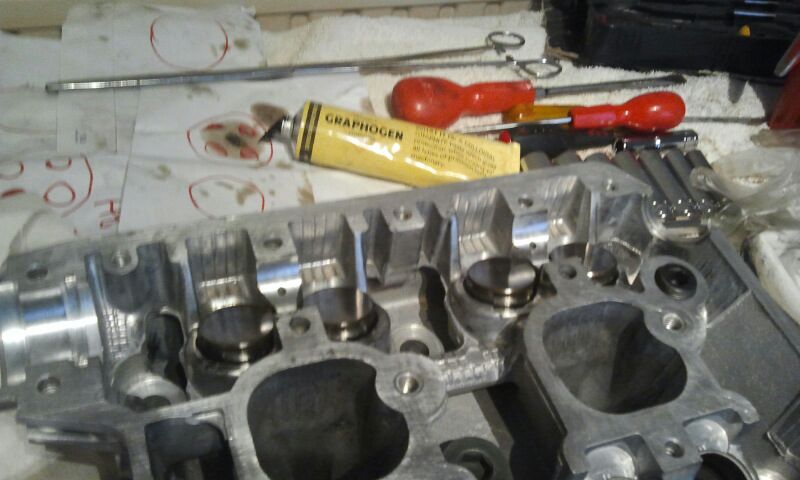
Thanks again fellas started off cleaning the threads out for the ARP head studs and according to the instructions your supposed to just fit them hand tight but, while doing my research (prior to the build) there's a few horror stories about them working loose .so I used loctite on the block end threads and used the small end of a allen key to slightly tighten them into the block . I applied the thread torque grease (that ARP supply with the studs to aid correct torque settings) and the cossie gaskets degreased the surfaces of the heads and block coated the ARP studs ,nuts and washers in the fastener lube and torqued the heads down in correct stages and sequance once heads were on i'd been advsied to leave the cams out so i could re torque the head bolts tomorow (let them settle over night) so i put the cam covers on to keep things clean and plugged all bungs ,inlets and masked threaded holes to get on with wire brushing the block and painting the acid etch primer on At this stage i could'nt resist sitting the inlet on top just to get a idea of the finished product😊

-
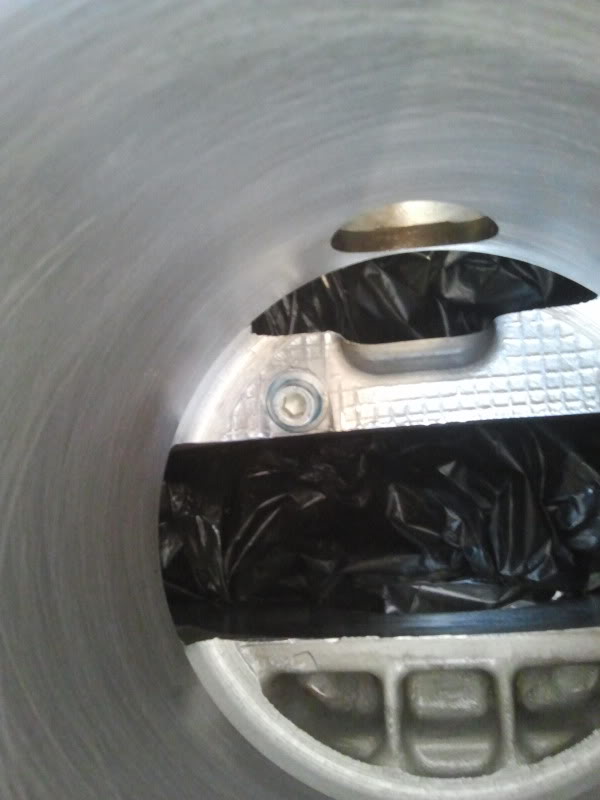
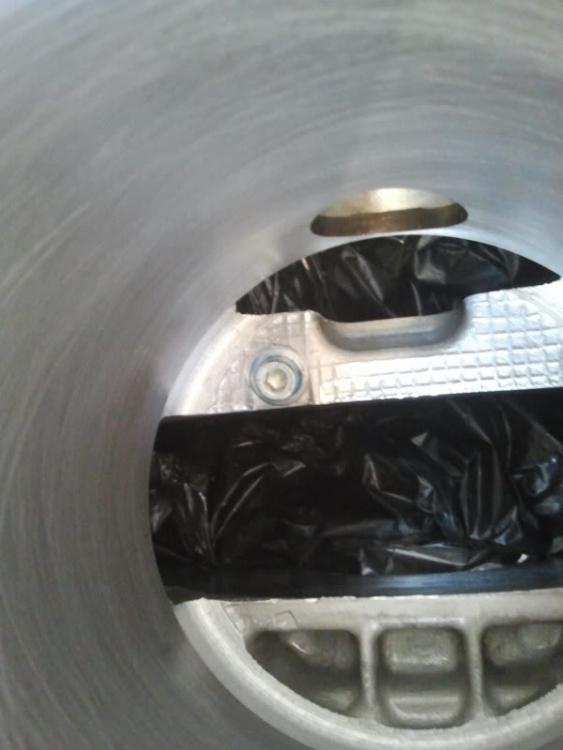
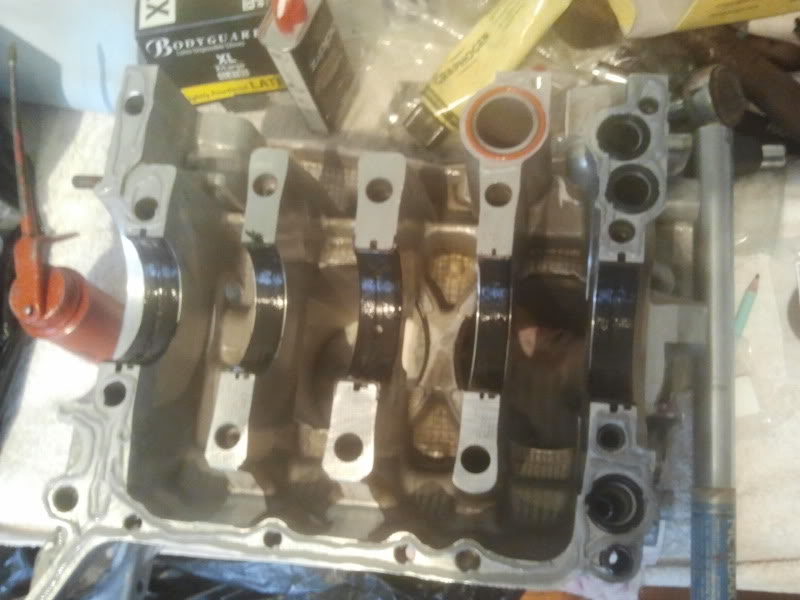
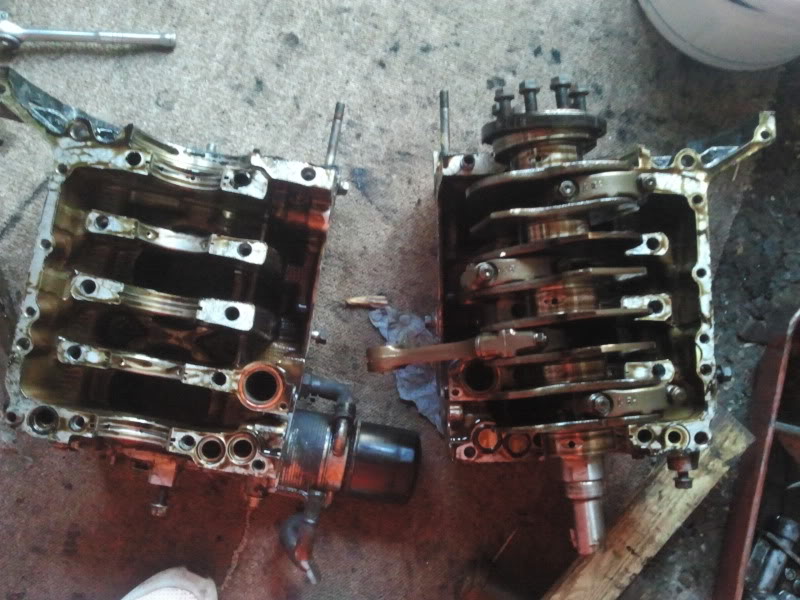
The mrs was fine with me using the kitchen table as long as I put towels then cardboard another layer of towels with a sheet over the top (and of cause flash wiped everything afterwards lol ) And yes gambit those pins are a pig ,you have to remove all 4 to split the block . I used a bbq kebab skewer to remove em lol as you have to take the outter circlip off and tap the wrist pin out from the other side (through the opposite access hole ) Next up i fitted the splash guards ,oil pick up ,group n gasket and sump on .followed by the rcm oil pump, water pump and cool running thermostat .
-
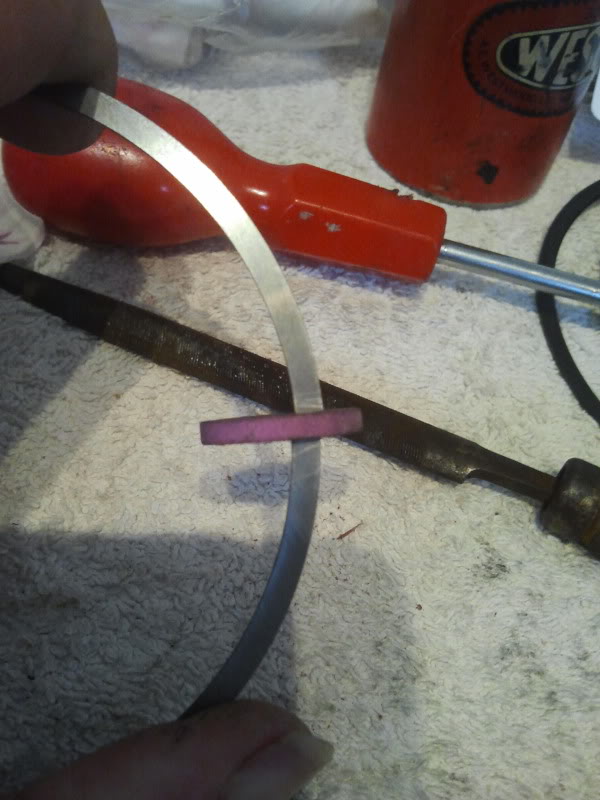
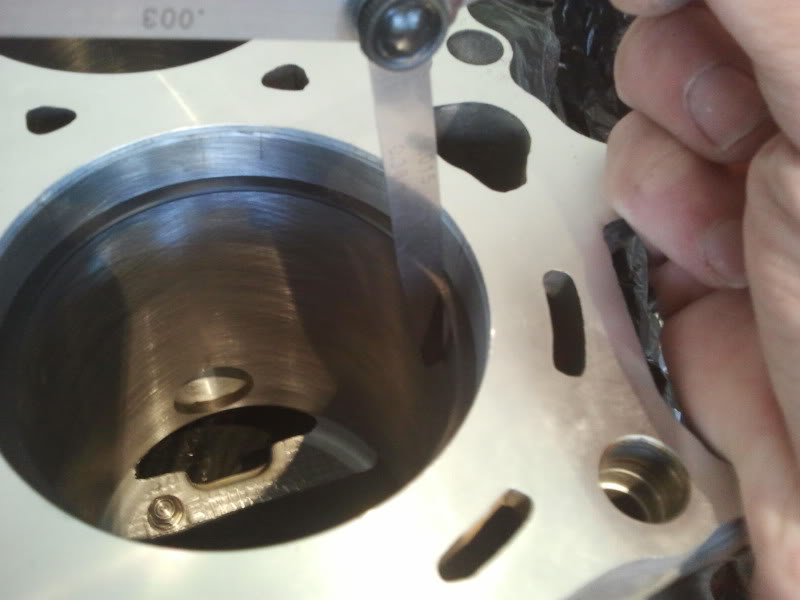
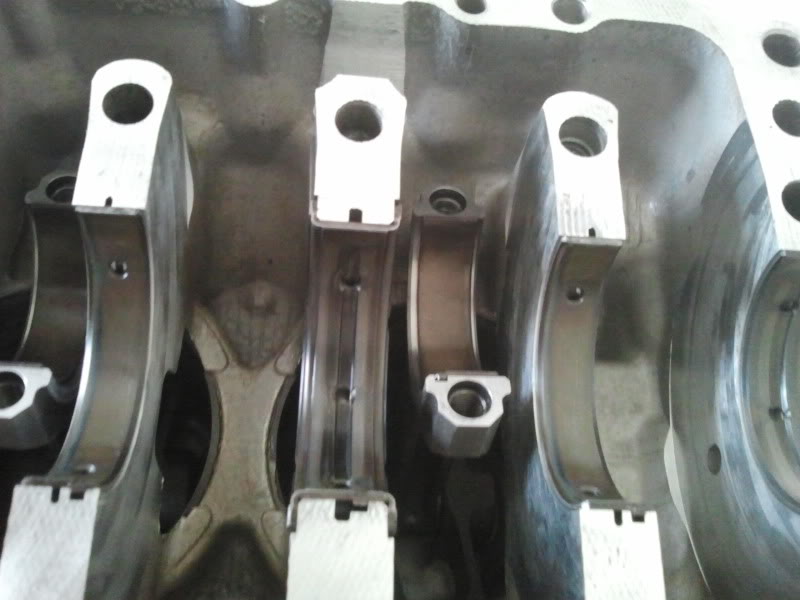
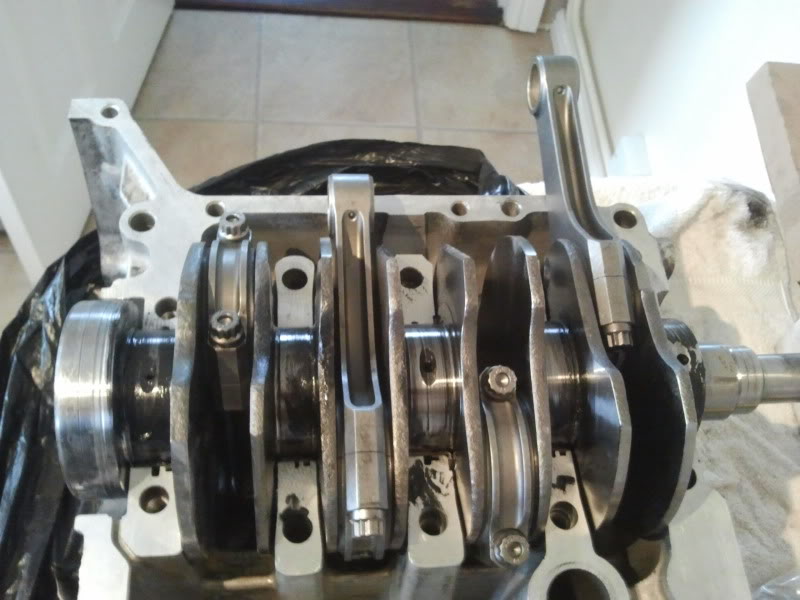
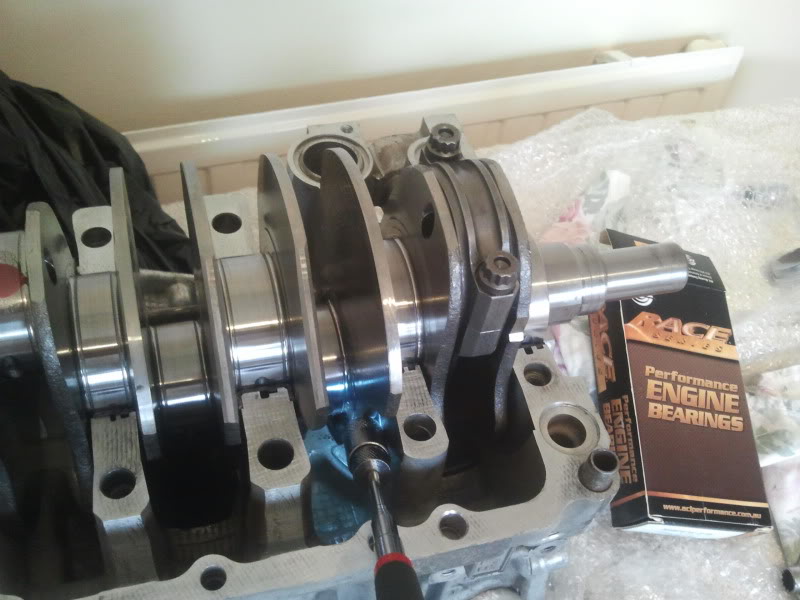
Cheers for the coments chaps and sorry for the late reply but ,what with the rolling road day , my map problems and the mrs being in hospital it's been manic . I started off by degreasing and blowing everything through with a air line id decided to delete the oil squirters to get over the problem with the contact they made with the piston skirts .Pat ( my engineer) had give me some suitable grub screws and i covered them in loctite (so they dont vibrate loose) the main reason i started the build in the first place was because of the piston slap my engine has when its cold and as id decided to aim for a maxium of 550 hp the piston to bore clearance was at the lower end of mahles spec .which should make it a bit quiter when cold but meant i had to adjust the ring gaps on all 8 compression rings to avoid the heat expansion causing a piston to swell and trap in the bore . I checked the gaps with a feeler gauge for each individual bore/piston yet again kudos to pat (engineer) as no matter where in the bore i positioned the rings they all had the same .009" gap you adjust them by gradually filing (both ends at once) by closing the ring around a file or stone to bring them to the required gap size i oiled and fitted the rings to all the pistons making sure each ring gap was in the right position acording to the mahle spec sheet .As you dont want the gaps inline cos you'd get "blow by" .before i slid any pistons into a bore i coated the bore walls with graphogen paste to help with initial start up . As subaru engines require you to fit the wrist pins (to connect the rods to the pistons) via a fidiley access hole i decided to connect the the right bank rods and pistons ,fit the circlips and drop them in the bores i could now connect all the rods (and the ones with the pistons attached) to the crank which makes life a bit easier, as i only have to use the access holes for fitting 2 pistons now 😉 once id torqued the arp big end bolts on the b.c rods i prepped the other block halve by fitting the new seals to the water and oilways ,smearing graphogen paste on the acl'd mains and give the block halves faces a coat of threebond liquid gasket i copperslipped the dowels and lowered the block half (with the pistons and crank in) onto the half with the "o" rings in to keep everything in place ,then torqued up the new block bolts(with new dowty washers on the ones in the waterways) in sequance i fitted the inner wrist pin circlips and managed to fit the other 2 piston and wrist pins/circlips through the acess holes but was chuffed i only had to do 2 as they are propper fidiley

-
He broke it about a month after he finished it :-( had a babe on the way (hence the s4) As for the camper van the bloke was running a 450 hp scoob engine anyway but, said he wanted the front wheels to lift higher off the ground when he hit the throttle :-D
-
Yeah you might have heard of my mate worbs (with the s4) as he had a few build threads on scooby fourums of his "black bird" 550 hp stroker classic .I helped him brake his scooby (as he couldn't sell it whole) the engine ended up in a flat bed splitty camper van :-D I did fid this pic of the mk2 golf he converted it to awd , forged the 18t engine, and strapped a massive turbo to it . I'd have loved to have seen it on the rollers
-
Think the type r has dccd but im unsure if his is wired up due to running a 6speed . It's supposed to be running 2 bar of boost (dyno'd@ 1.8 bar) and the gt40 hits full boost at about 5k and just lights the tyre's lol . He couldn't shake me from his rear view mirror though due to mine hitting full boost by 3.5 k but my fueling is all over the place at the moment :-( . It was a good laugh all the same and only 2 no shows . My mate with the s4 sold it and bought a 330 d:-( And the 1800T 4x4 mk2 golf hasn't been finished yet ,but its a mental machine which should be running 600+
-
There was a st focus as well but, the s4 or the 1800 t mk2 golf didn't make it unfortunately . I followed steve up there and when his gt40 came on boost the !Removed! end squirmed whatever gear he was in , I think it's gonna be a animal once it's sorted :-D
-
Didn't quite get the figures I was after on the rr session 290 hp in a 6 speed classic ain't slow but I think it was running the old map due to the afr graphs (long story lol) Didn't take to many pics (and they were on my phone) The black v8 mustang was on the end of the row And a couple of Steve's stroker type r which made just over 420 hp (due to a possible boost leak)but , shoulda made 500+
-
I know a little bit about esl's but bugger all about electronics they run with the factory ecu (rather than replace it) retaining the factory ecu's ability to advance and !Removed! the timing to reduce knock and read fault codes. although the early esl has been out for about 5 years the 97/98 version scoobs had a different "code" and the esl has only been out for those for just over a year or so .the 99/00 version esl board isn't out yet (but is in manufacture ) so I assume they run a different code as well and as far as im aware they don't do one for newage but, their catered for by ecutek licenced software (rather than esl's open source software) if you wanted to create a new interface for live mapping ecu's id suggest you drop the likes of simon @ jgm a email as hes a quality Scooby mapper who knows his software I do have to 1 pic of a early board fitted to a early ecu dunno if that's any use to you john
-
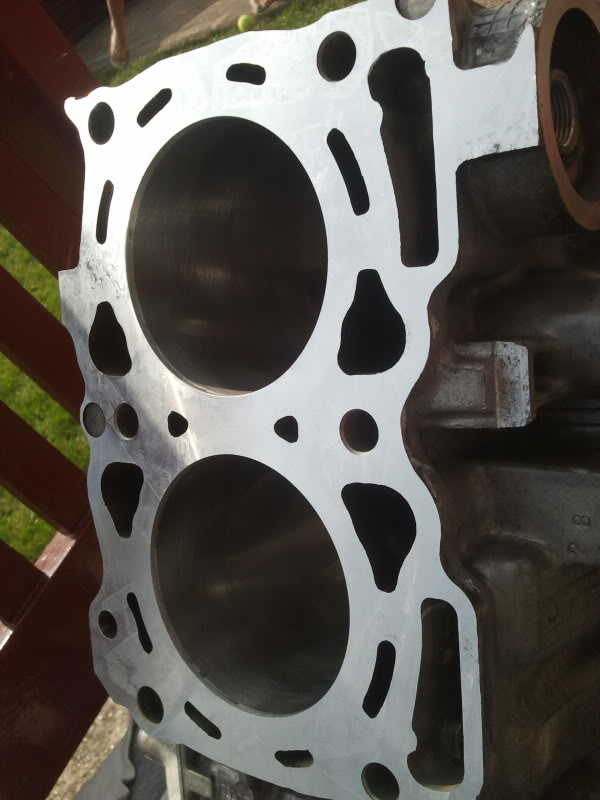
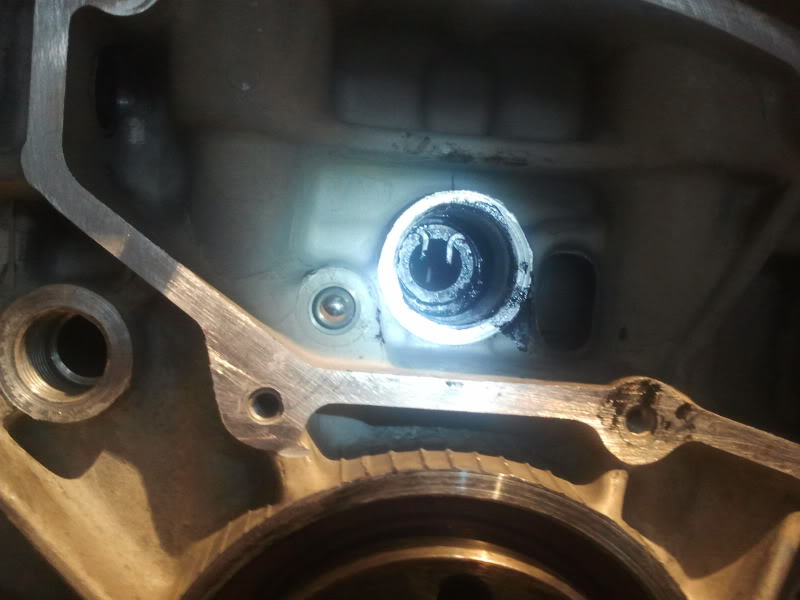
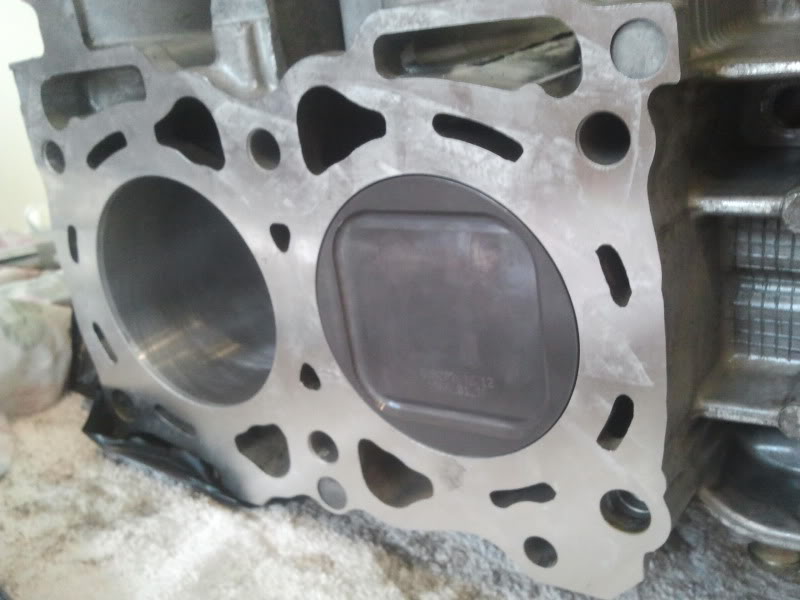
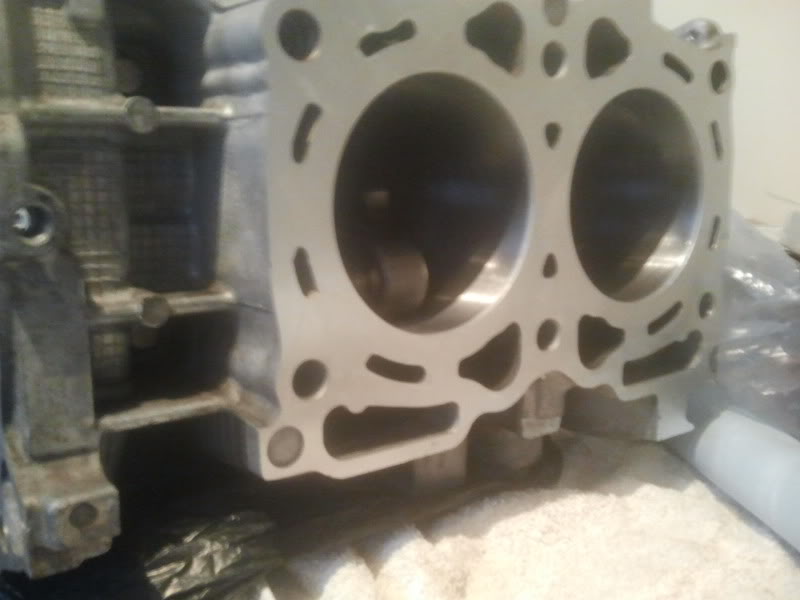
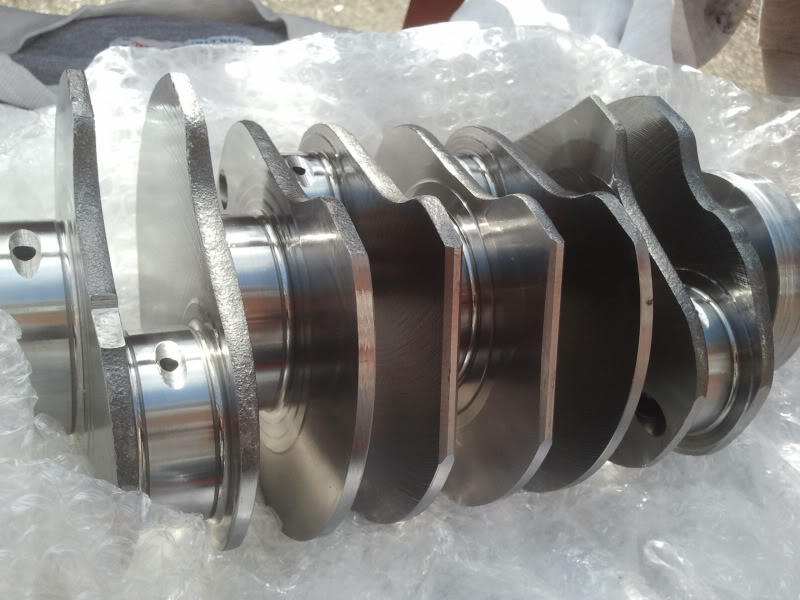
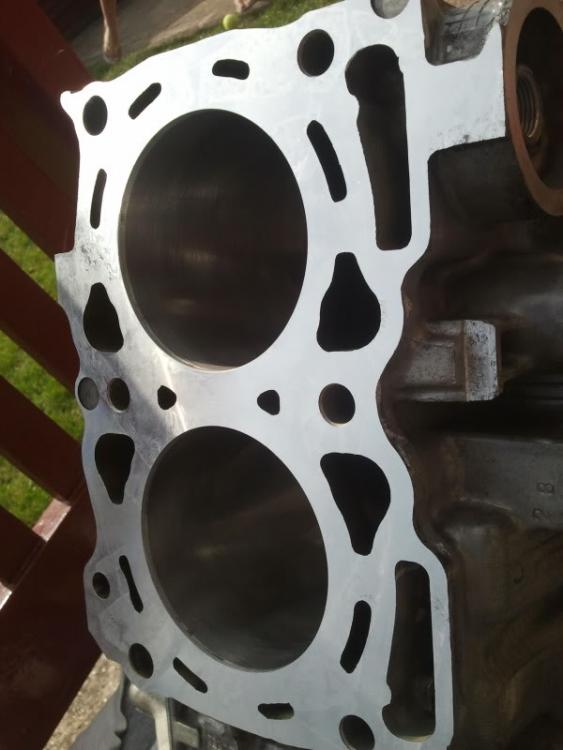
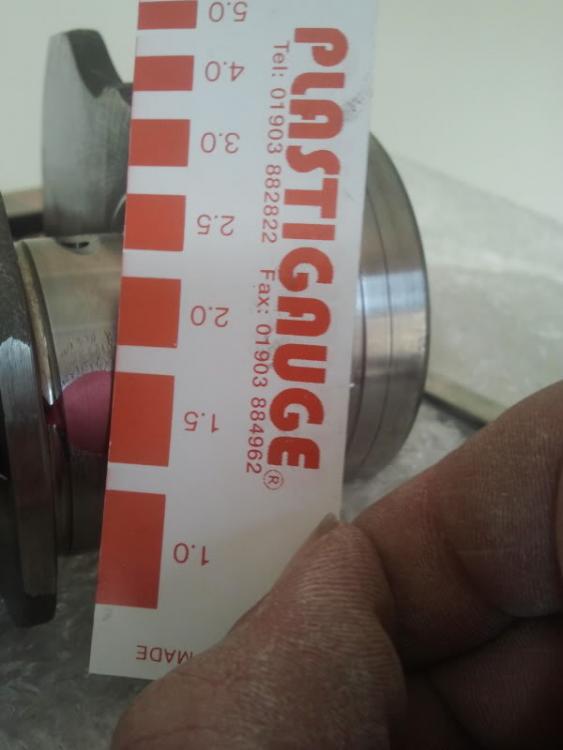
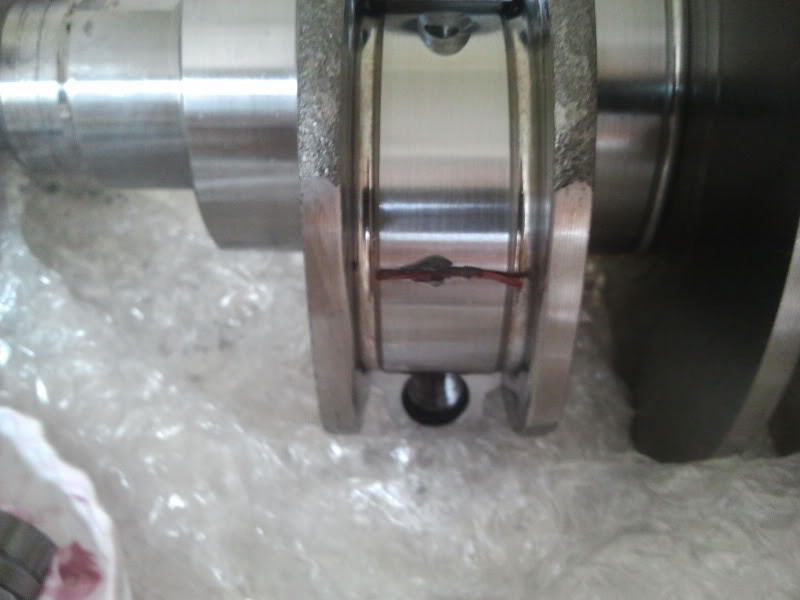
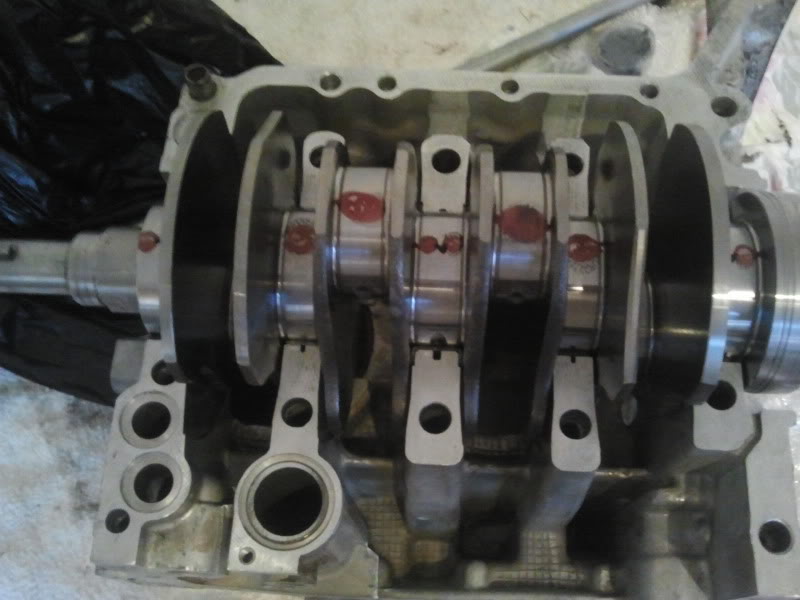
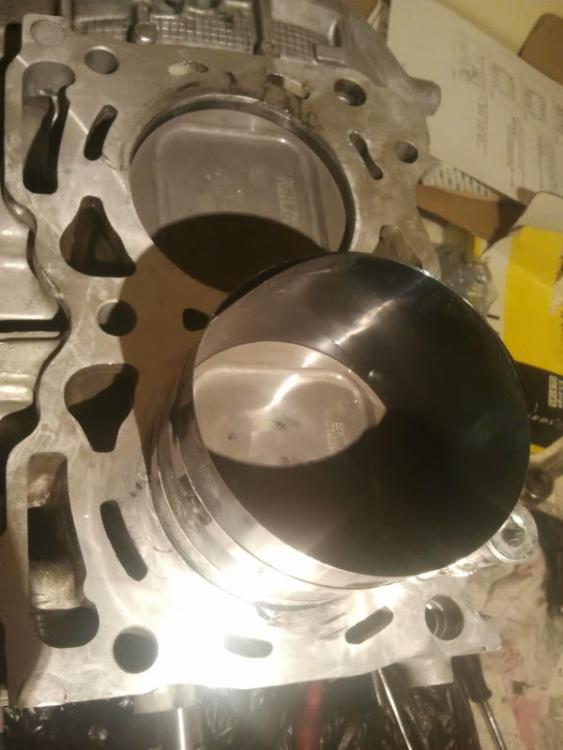
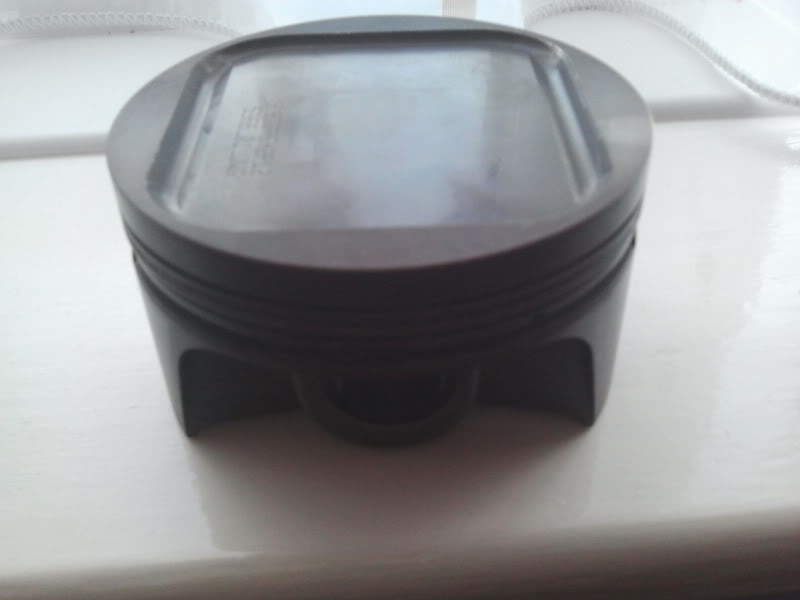
well the ocd mrs was kind enough to let me use the kitchen table to build the engine on :) and as her kitchen table probably the cleanest environment known to man, it was ideal to build a engine in :D the engineer said the crank was in perfect condition so I decided to get it ultrasonically cleaned as the 2ltr crank has sludge traps in the oil ways which cannot be rod'ed clean. which also saved me the cost of the 2.5 ltr crank and a thrust conversion ,that's needed to fit the later crank to increase the capacity to a 2.1"stroker" (due to a longer throw) Pics of the minty 94 crank and the quality of the deck face . started off the bottom end by fitting all the acl race series bearings to the B.C rods and then checking the big end clearance with plastigauge , basically (for those who dont know) its a thin strip of wax which you place on the (clean) journels of the crank before you put the big end caps on . Next put the caps on and torque to the correct settings then, when you remove the caps , the wax has compressed giving you the excact (oil) clearance between the crank and bearing (which is measured with a gauge) next i dry built the block (no liquid gasket between the 2 block halves) fitting the race acl's and plastigauged the main journals and torqued the block halves together in sequence both big end and main bearing clearances were well within the standard tolerances and nowhere near the "limit" tolerance subaru give for a rebuild id been warned to check for under bore oil squirter to piston skirt contact ,as the race spec mahles have a deeper skirt to cope with the extra power, so i assembled one of the pistons and rods slid it into a bore 😒 everythings been going well so far 😐 spose something had to cause a bit of a problem theres a tiny amount of clearance between the under bore oil squirters and the piston skirt, but not enough for my liking ,so i deleted the squirters by fitting a blanking grub screw. which is not a problem as newer piston materials dont need as much cooling and the mahles cool the gudgen pin via the oil ring .
-
Cheers jay and gambit I'll chuck some more pics up later of me building up the engine ,as it might help a few people if they are considering working on their own scoob , if nothing else it will help people be more familiar with the boxer lump ;-)
-
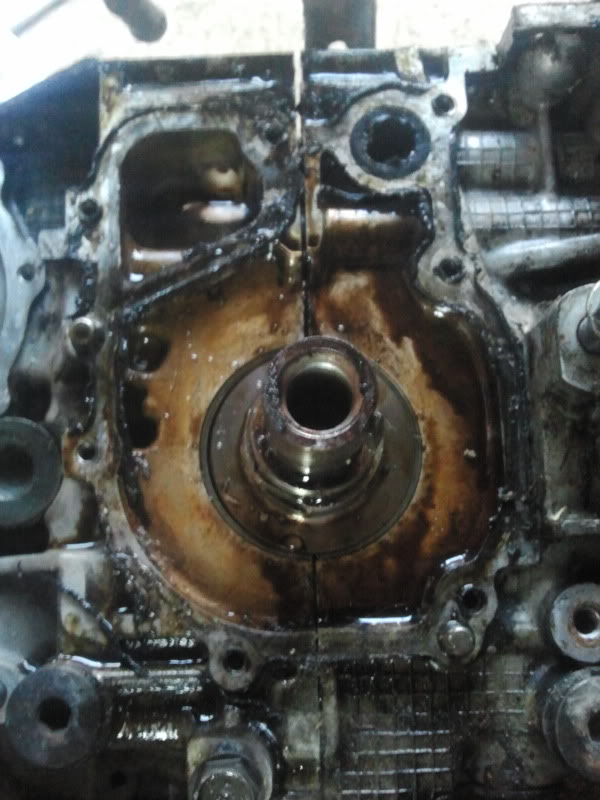
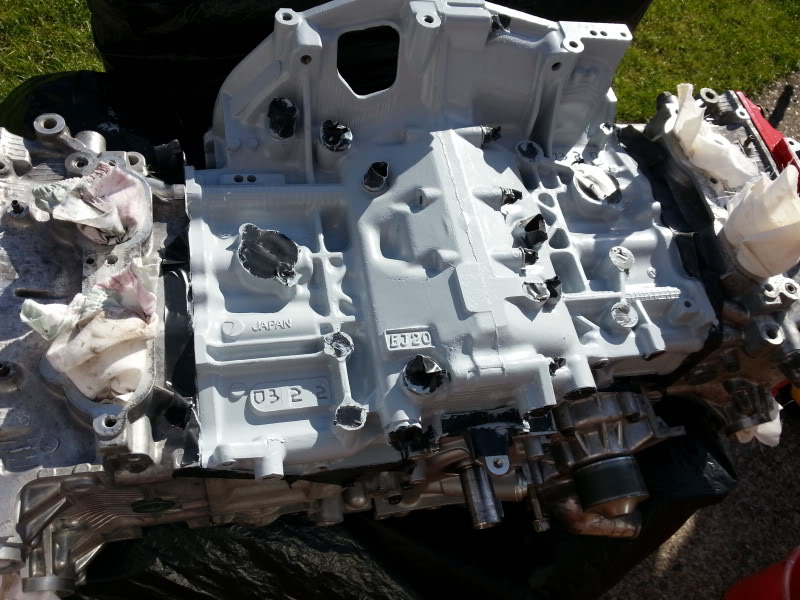
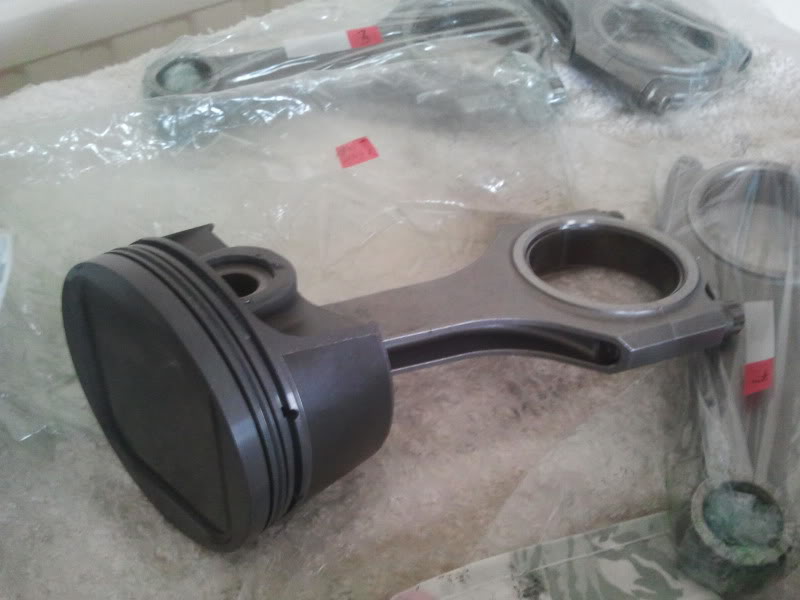
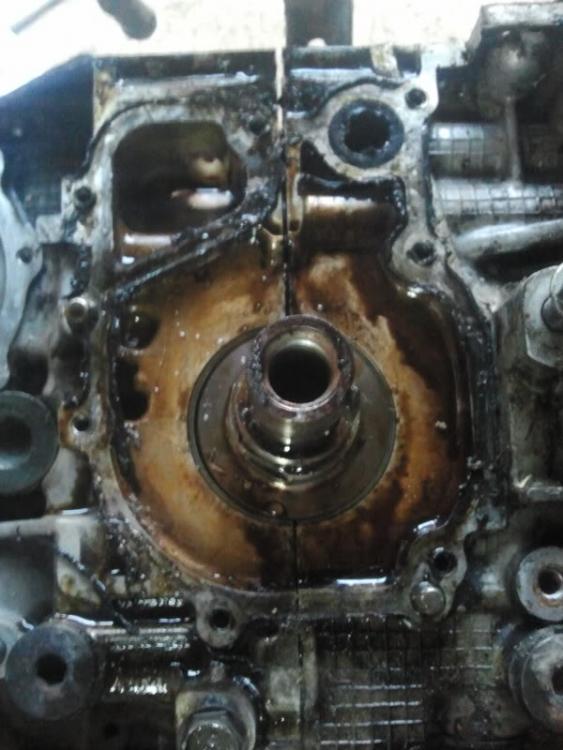
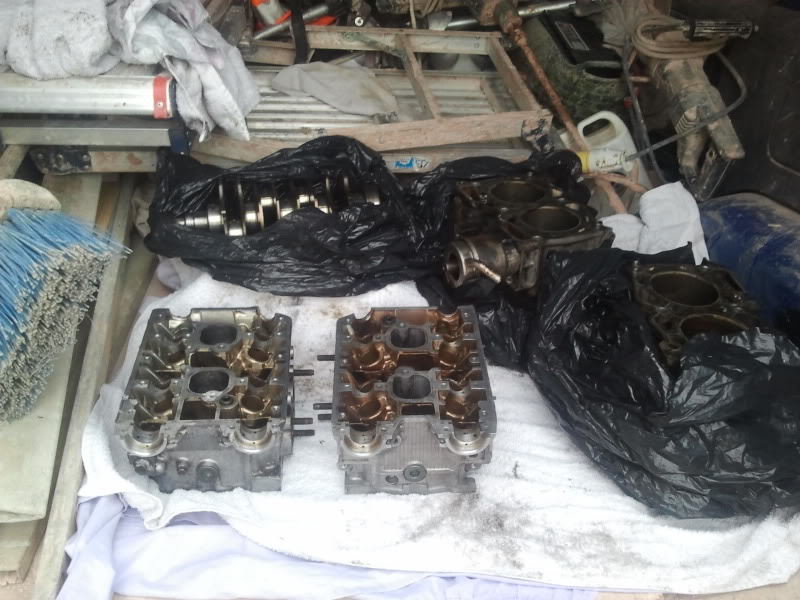
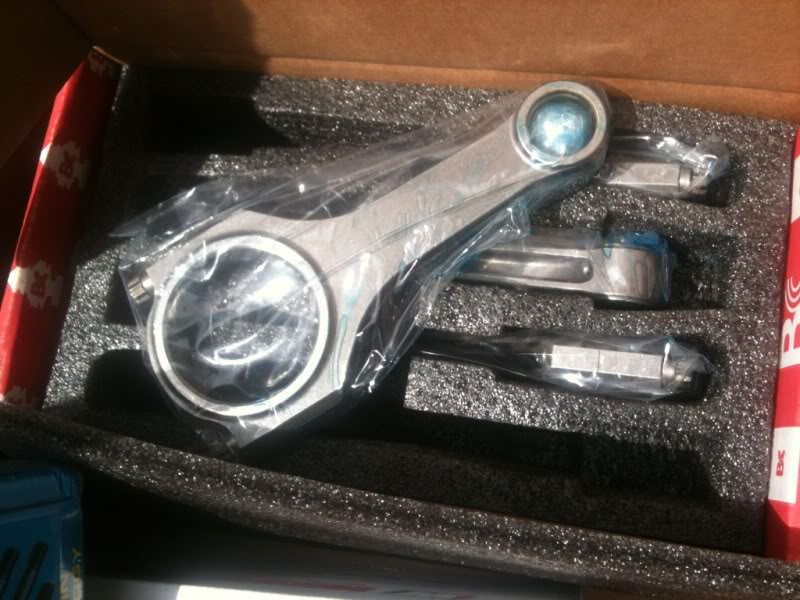
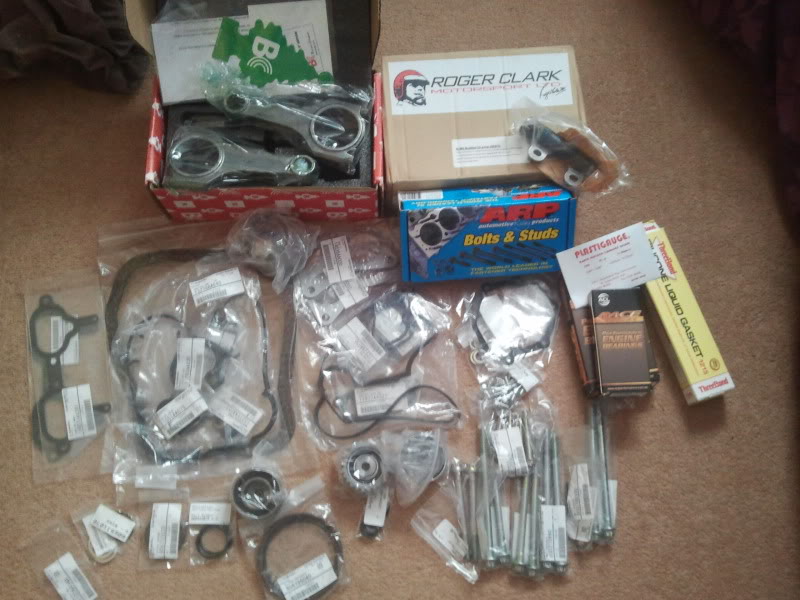
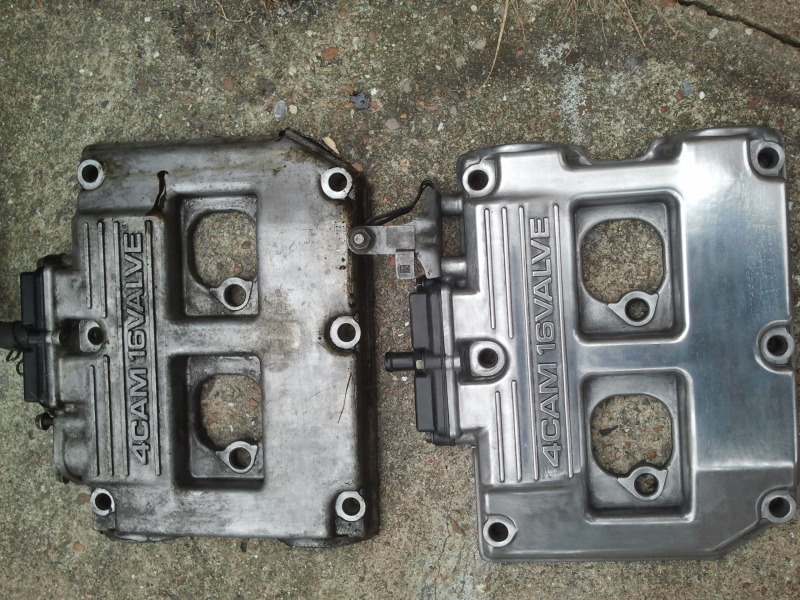
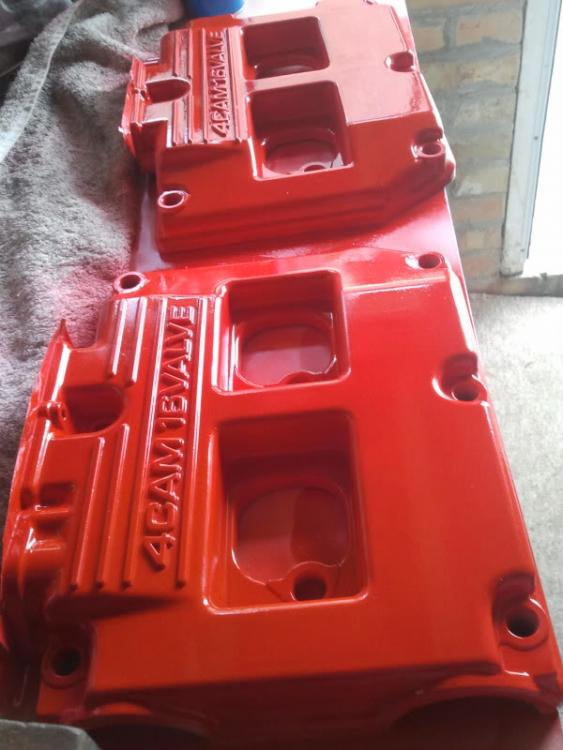
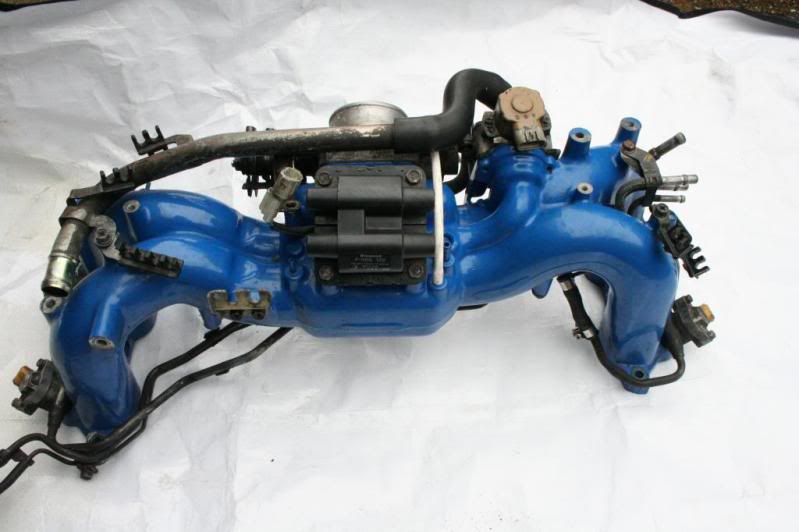
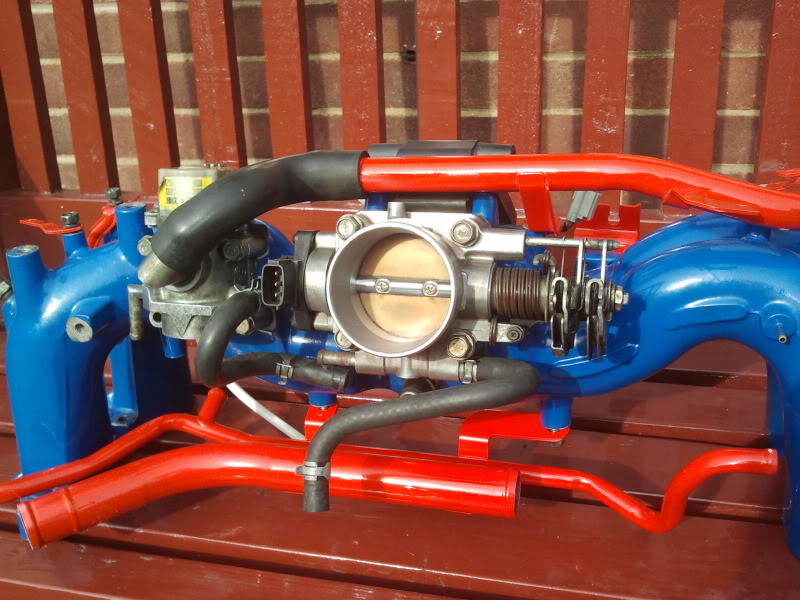
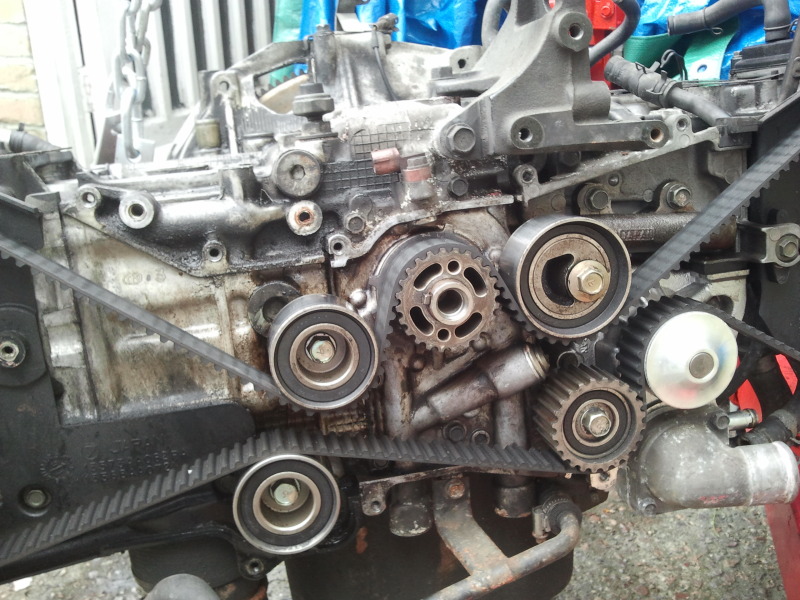
cheers gambit I will admit although ive rebuilt straight fours ,v6,s and v8,s in the past, its my first boxer build so I would have been a bit lost if it wasn't for the pdf service manual I've been using. IT'S A GAME WITH 2 HALVES ☺ next up was stripping the bottom end ,id removed the sump and all the case bolts but couldn't split the block halves they were stuck together at the modine end (bit with the ### marks in the bottom of pic bellow) so after about 2 hrs of putting bolts in the outer casings and trying to prize the halves apart 😠😤(as I didn't want to damage the block faces poking screwdrivers in) I did all the bolts back up and released the modine end first 😉 I sent the block halves and crank off to my engineer to check them over as id decided to fit a set of drop in pistons while it was apart 😊 by chance a friend had ordered the wrong rods for his build and sold me these brian crower sport compact rods for a price that couldn't be refused B) as their rated to 750 hp it seemed a shame not to buy pistons to match so I bought some race spec mahles which are also rated to 750 hp then got the rest of the shopping list together arp headstuds and big end bolts rcm oil pump acl bearings new block bolts full oe and group n gasket kit new timing belt rollers and tensioner Kevlar timing belt then got bored waiting for the engineer to complete the .5mm over bore (needed to fit the new pistons) and face skim work ,so I started to polish and paint a few bits .id originally decided to polish the cam covers and had already prepped them but after a bit more research had found that they would need to be re polished every few months or sealed with a clear lacquer so I painted the bare ally with a adhesion premotor, enamel primer and enamel paint picked up a powder coated inlet for £40 😎 Then painted a few pipes and polished the throttle body before assembling it all together
-
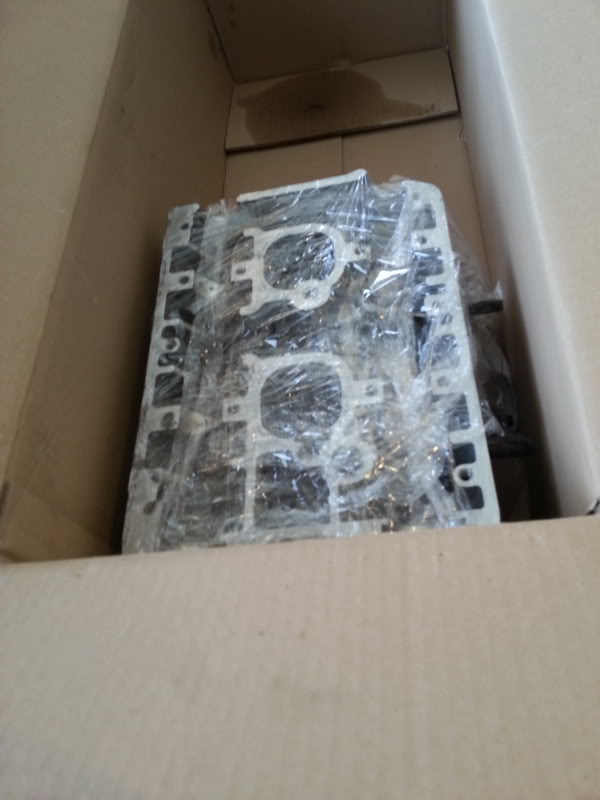
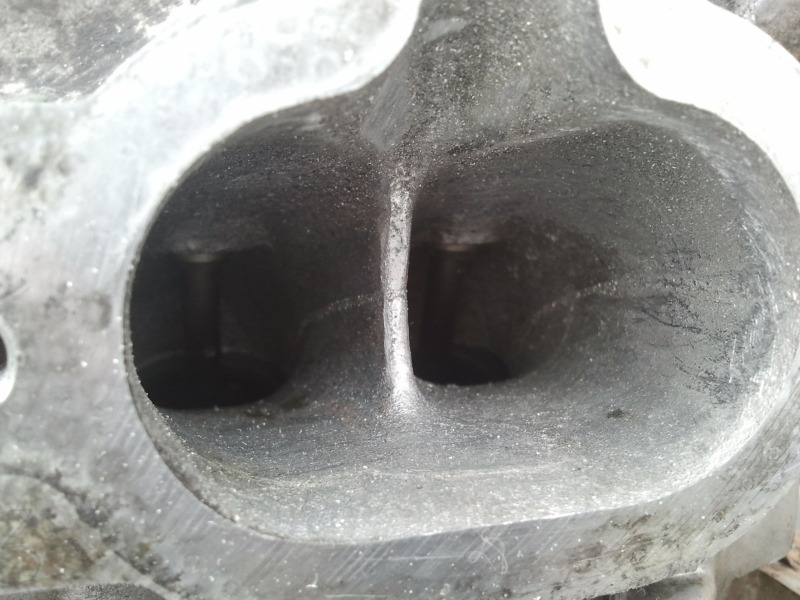
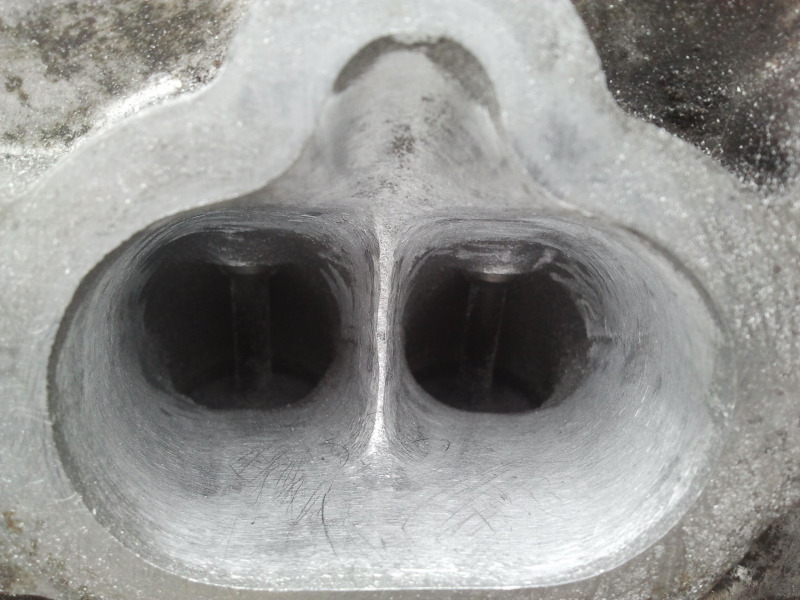
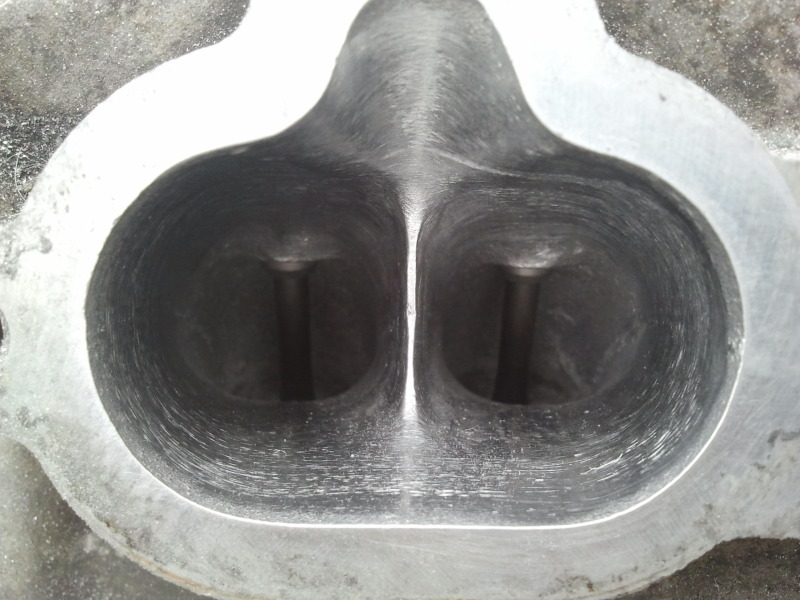
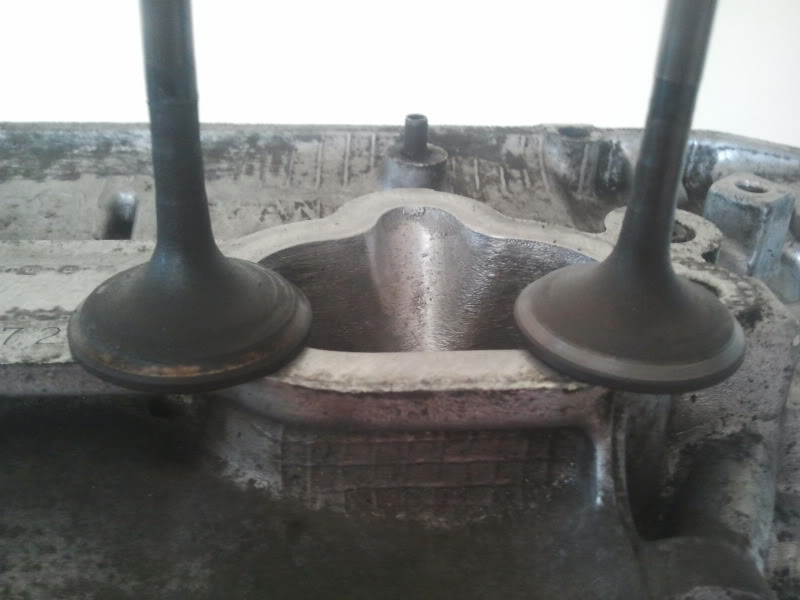
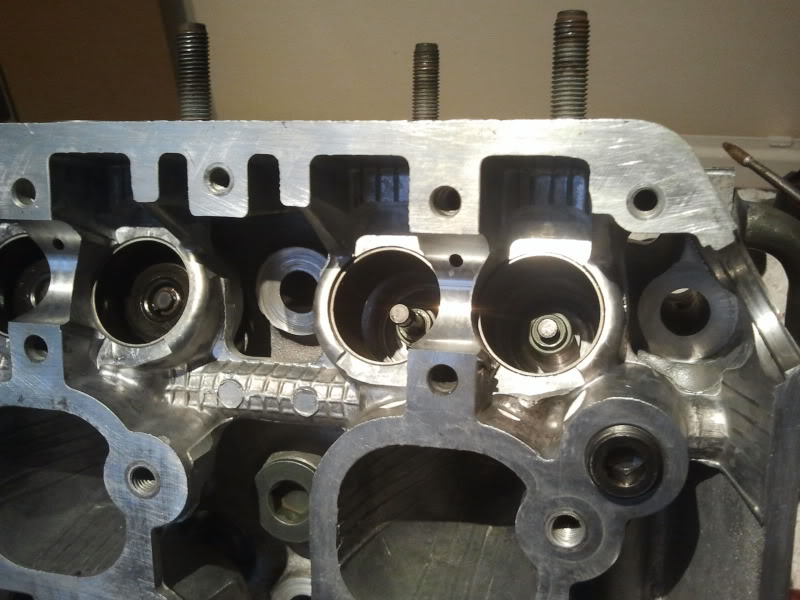
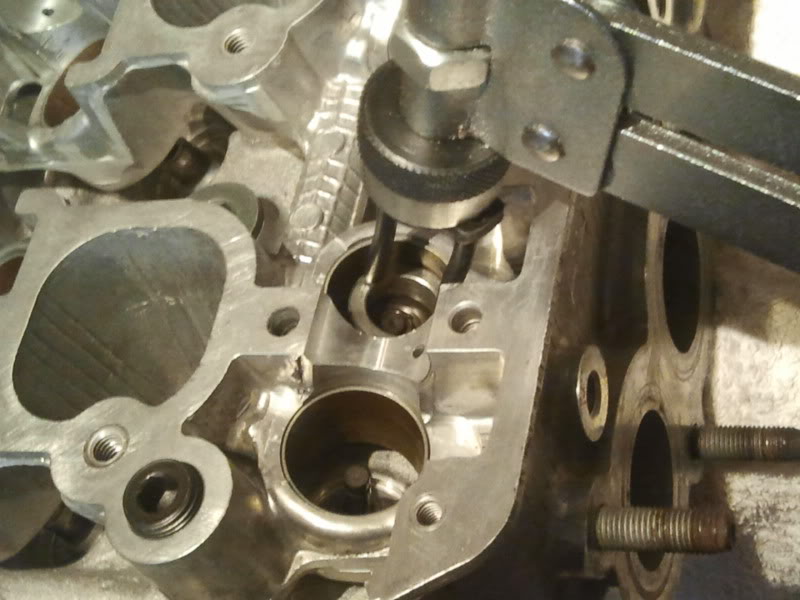
whilst saving for the machine work and gaskets I started to do a bit of work on the heads, light port and polish before stripping them down . standard inlets lightly ported and center separation "knife edged" and a light polish I started to lap the valves in but wasn't happy with the amount of contact area for the valves to seal ,heres a pic of before and after so I sent the valves off to the engineers (with the heads) and he skimmed the heads chucked the through his hot wash and re cut all the valves I then re assembled the heads with graphogen engine builders paste and new valve stem seals valves and collets in , proppa fiddly job 😐 lash caps in then bunged all outlets/inlets, sprayed the heads with oil ,wrapped them with cling film and put them in a box upstairs to await the bottom end build


-
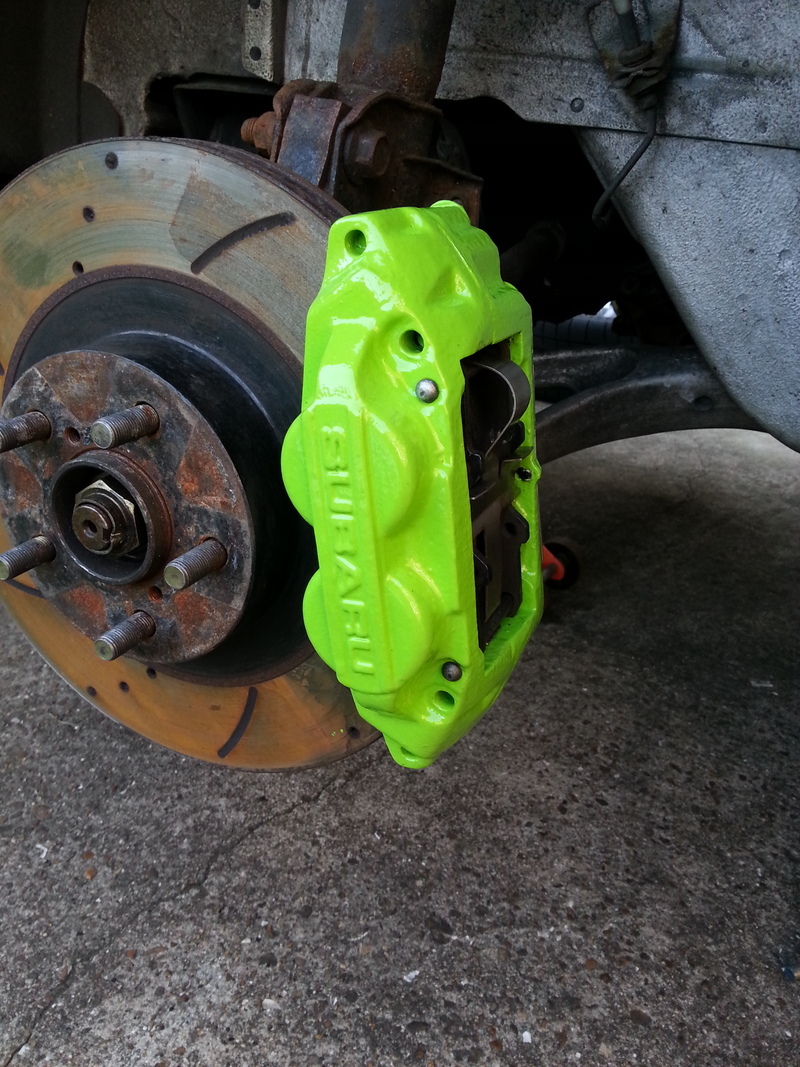
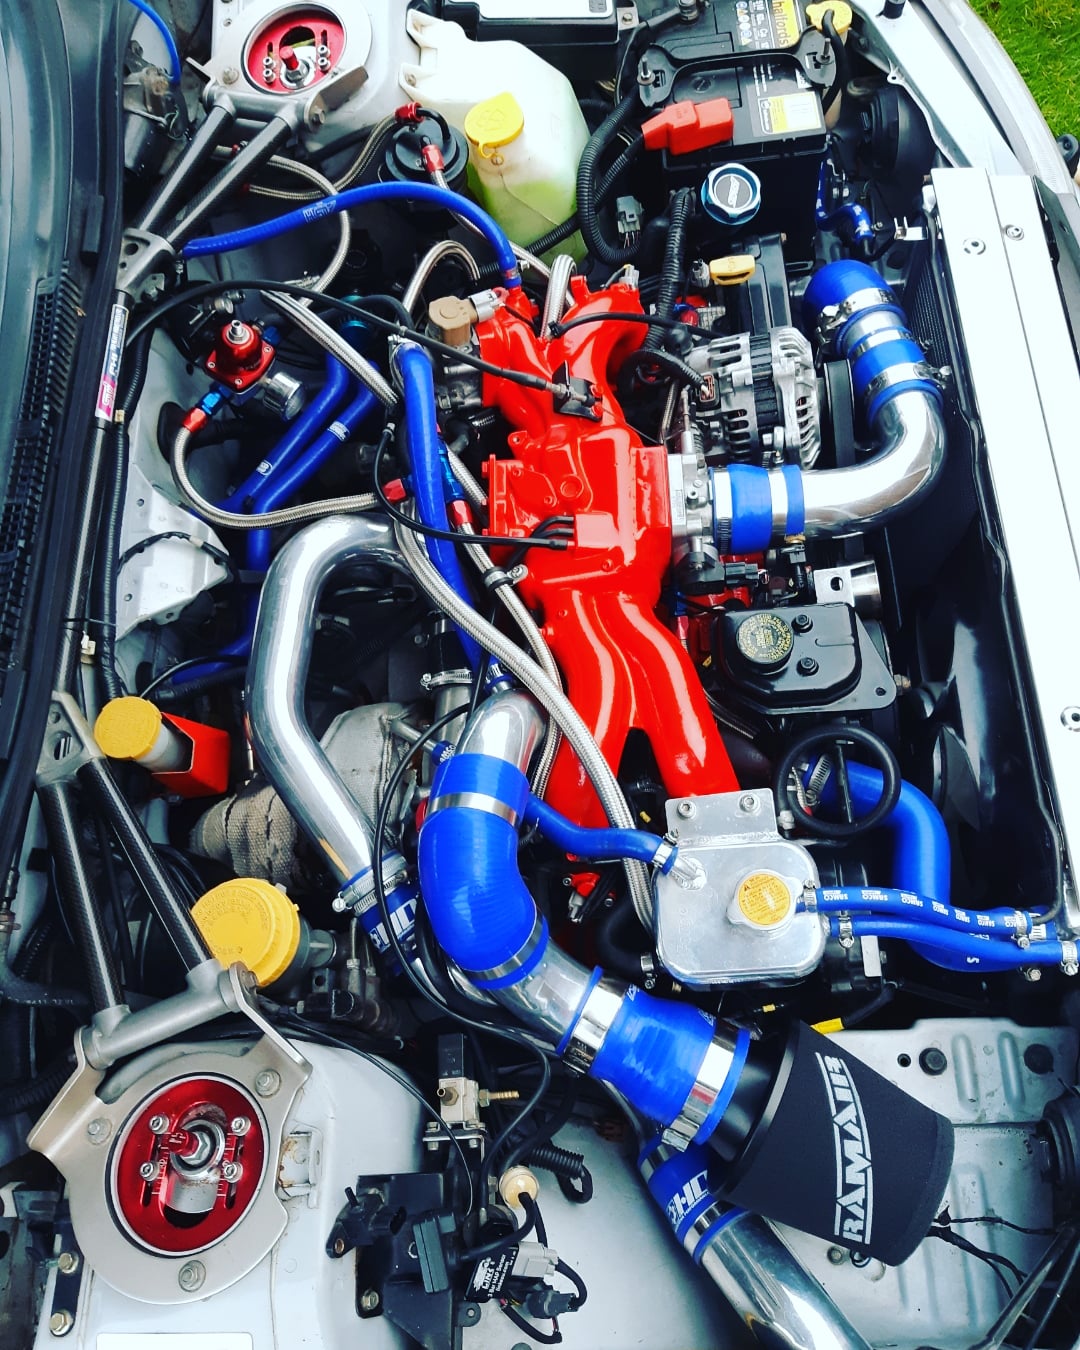
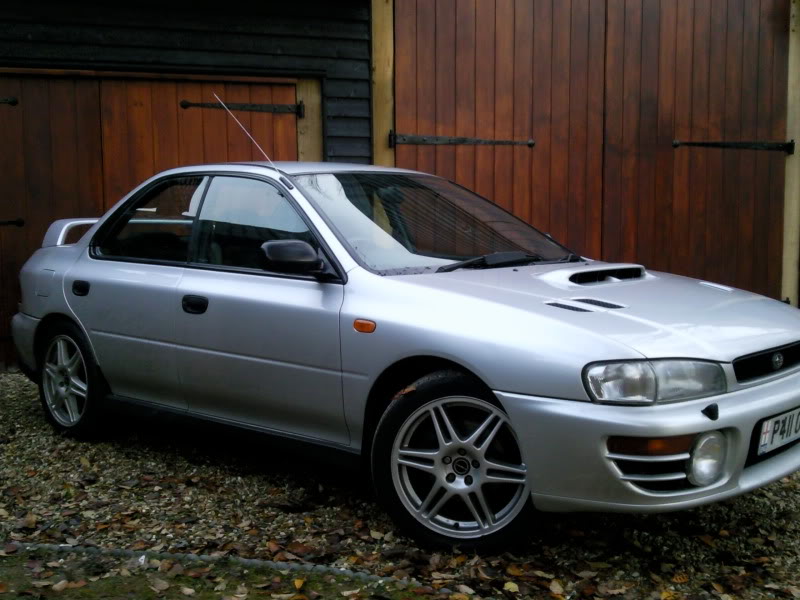
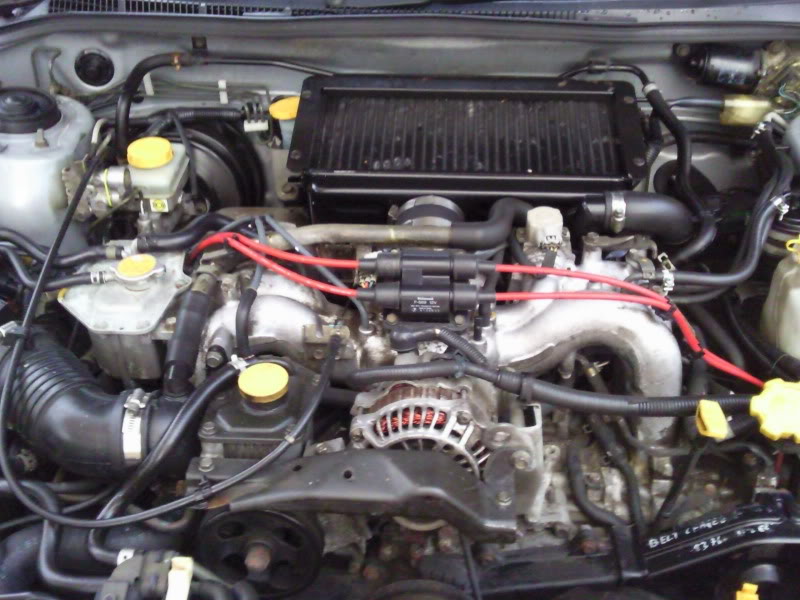
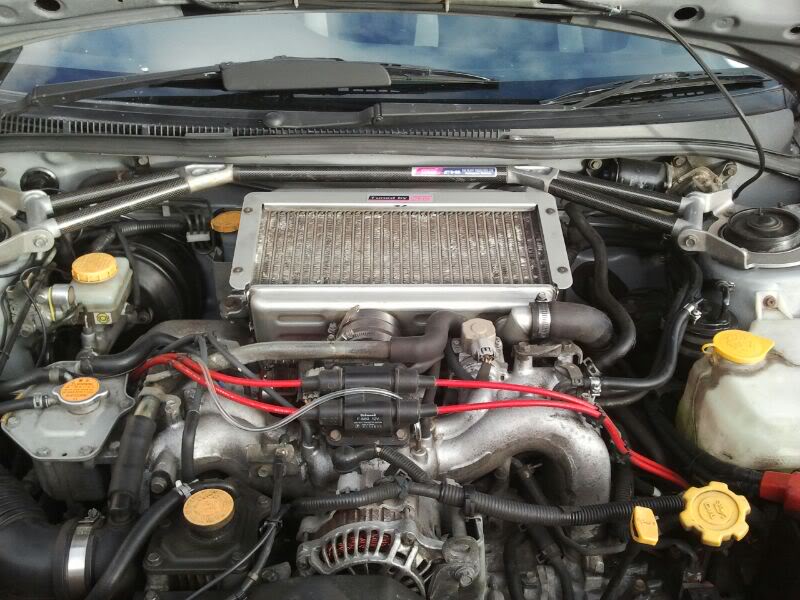
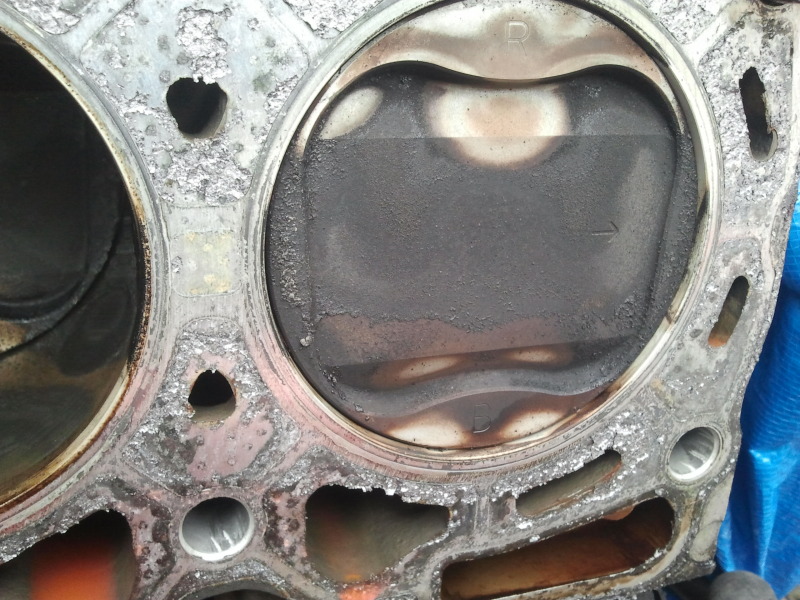
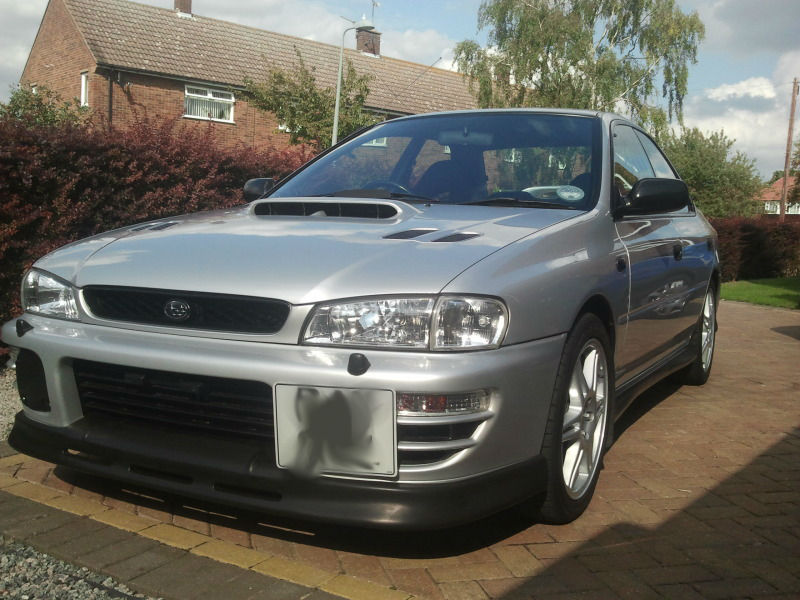
well I thought id post a few pics of my never ending project which has snowballed from telling the wife "just a exhaust and remap then ill be happy" to a full engine rebuild , drivetrain swap and then a reshell I started off by looking for the cleanest and most standard uk classic my £2.5 k would buy me 2 yrs ago.I ended up with this my97 uk turbo 2000 which had full s/h 92k miles and was bog standard bar some braided brake lines B) Then kicked off with a k&n panel filter ,air box resonator delete,sports cat ,zigen cat back,sti tmic and strut brace while I was waiting for the 97/98 esl to be released (as I knew I could fit those without needing a remap) which changed the engine bay from looking like this to looking like this the 2 pot front brakes were so bad they were scary so they were replaced wiith a set of 4 pot front callipers (which I refurbed with stainless pistons and new seals) accompanied by groved and drilled discs and Kevlar pads then fitted a hta p1 rep splitter ,moved the number plate and fitted a crystal light pack to freshen the look and detango the lights closely followed by a esl remap with twin maffless maps which saw a increase in boost (0.8 bar to 1.2 bar) and power to 265 hp 😄 next I concentrated on a few handling tweeks that wouldn't make the kids chip their teeth in the back seat :) so I went for elbaich pro springs which are progressive rate and only stiffen up under load (when cornering) whiteline rear arb and droplinks and front ally droplinks which I think is a great combination for road use 😉 as me and my brv both own classics we bought a v1 sti with a few choice mods on in order to round up a few spares and I ended up with the closed deck block sti long engine left over which is where my project starts to snowball although the engine was making 340 hp with low knock on the apexi ecu controller I decided it would be rude not to strip and refresh the bearings gaskets and seals ;) once I started to strip it down I could see it had been well looked after due to the new water pump and timing belt and once the cam covers were off I was surprised how clean the engine was B) bearing in mind it was outta a 20 yr old sti 😉 similar story once the heads were off as the piston crowns showed just a build up of carbon that you'd expect and nothing untoward

-
Yeah I've been chatting to tim a lot as i always get my oils and fluids from opie ;-) I have got through quite a bit lately what with fitting fluids, running in oils ,filters and the fully synthetic millers im using now . I was only discussing with him today if I should change to a different oil grade for winter and while I'm running less than targeted power for my engine (as it's running colder than anticipated)
-
Wish I'd have read that before I phoned you today tim , Could have saved us both a bit of time :-) Cheers Clive
-
I think your right miggs as I'm sure ecutek is just the licensed software added to the standard later ecu. And I know esl do a early chip 92 /96 which didn't used to run mafless and a later chip 97/98 which does run mafless (which I've got in mine) Esl have either updated (or are in the process of updating) their software to include anti lag and launch control which I might have a look at soon
-
.25 gap is fine fella Depending on which version of scoob ,The rear earth strap connects to the bell housing or ridge on gearbox (near the clutch slave) and the other end is connected bulkhead (near the "dog bone" gearbox stabilizer) or loom off the starter motor
-
Here's the esl board for a pre 97 classic I broke a while back
-
Esl is a chip (daughter board)thats soldered inside the ecu and runs with open source software to allow live mapping (I've got a pic somewhere I'll dig it out) I think the ecutek can be used on later classics (mainly newage) although I'm unsure if it is the same principle (board soldered in or just software added to the oe ecu) but you defo need a licence to use the ecutek software to map it
-
sounds like a plan B) I ran my self build in for 1k miles on the 380's (greys) with actuated boost (0.5 bar) and then fitted the fpr and 550's the day before the remap ;) as saved me the expense of getting a running in map done Admittedly I blew the 5 speed to bits 2 wks after the remap do you know if you've got a daughter board (esl or ecutek) in the ecu to allow it to be mapped ? as that could be a added cost you might have to consider if it hasn't already been mapped ;)
-
have you got a boost gauge fitted ? as if its unmapped it should read 0.8 bar I run ngk 7's (not the ngk6's)but I think their the same fitment just a different heat rating . if you pop the plugs out (to do a compression test)check the gaps and look for cracks in the porcelain.as if over gapped the spark can be blown out by the boost and being awkward to fit ive heard of them cracking during install ,both of which give a misfire symptom . earth sometimes the earth cable under the tmic can either be forgot to be refitted or corrode .The loom plugs are 2 grey plugs that undo to allow you to remove the engine without unplugging every sensor . There located at either side one behind the windscreen washer bottle and one near the boost solenoid ,id check those and look for any break in the insulation on all the sensor plugs (cam,crank ,maff,map lambada ect...) ideally I guess you need to find someone local with the same version scoob that's willing to swap items over ie maff map ect as there the usual culprits for your symptoms. or find a local (or mobile)scooby mapper as they might be able to fault find a bit better than someone with a generic code reader.